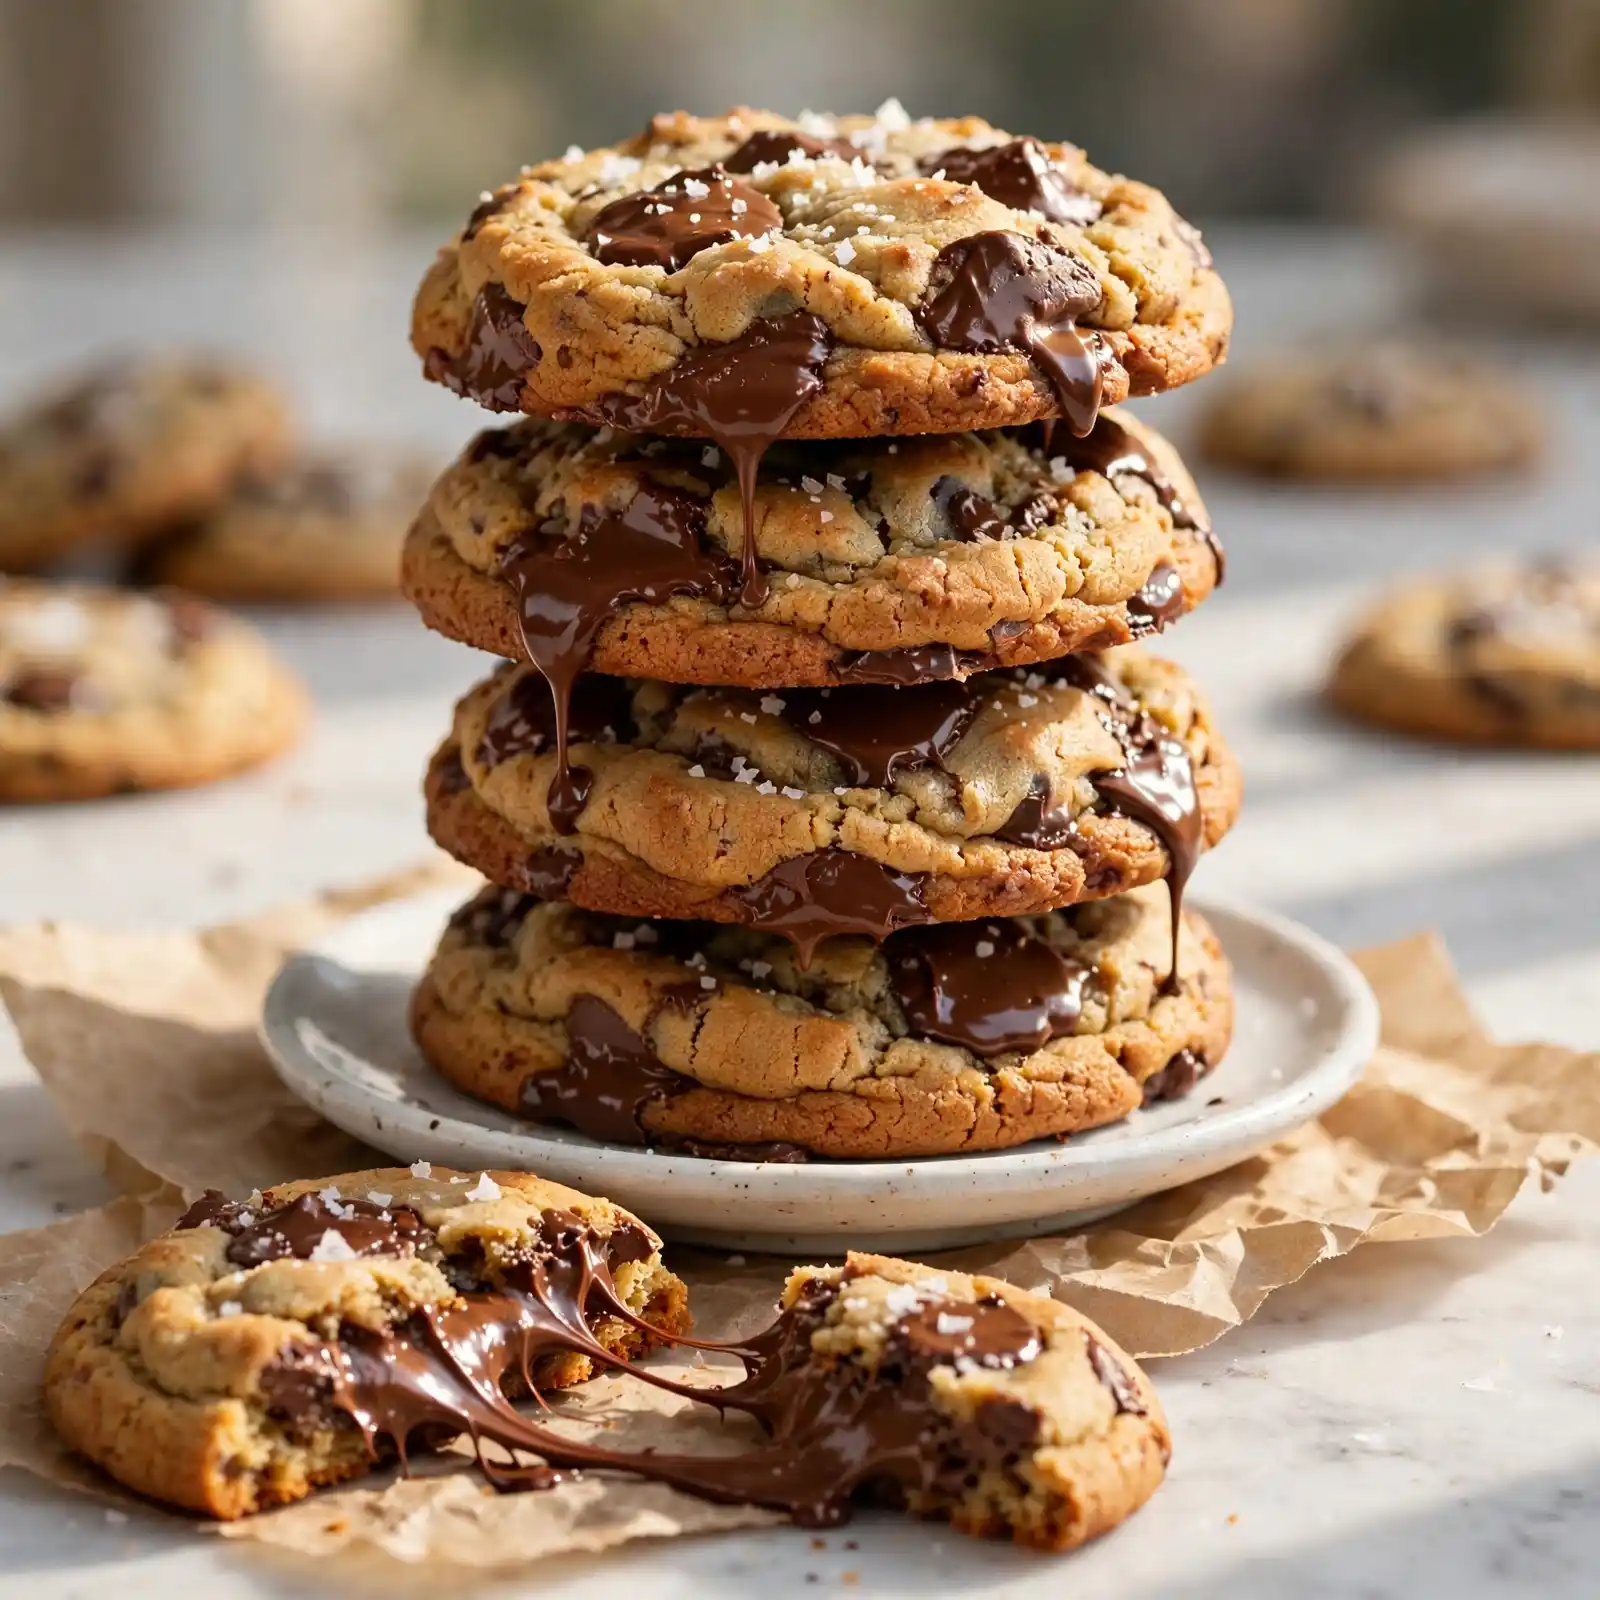
Soft and Chewy Chocolate Chip Cookies from Scratch
There is a reason chocolate chip cookies are the first thing most people think of when they want to bake. That smell coming out of the oven. That warm bite right off the tray. Nothing else comes close.
The tricky part is getting them right. Too flat. Too hard. Too cakey. Most home bakers have had at least one batch go wrong.
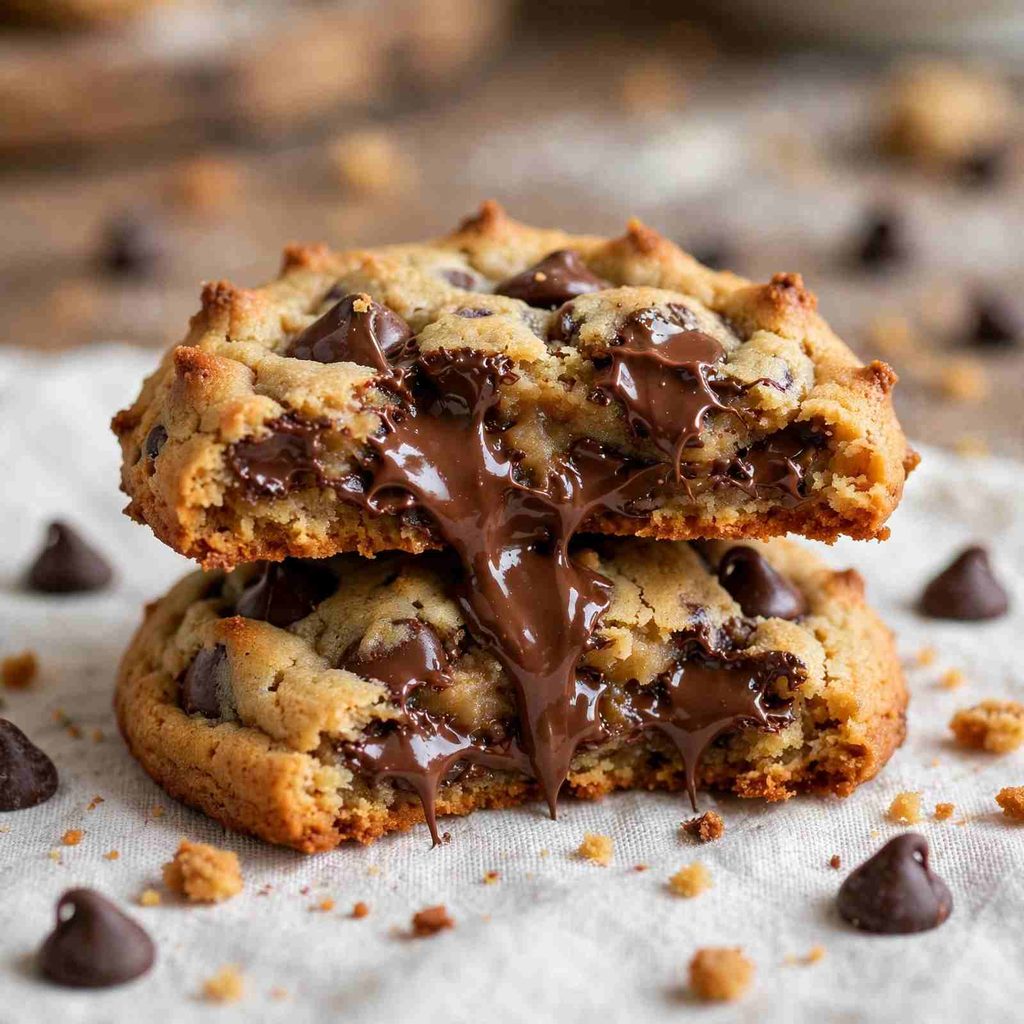
This recipe fixes those problems with one simple step. Chill the dough in the fridge for 30 minutes before baking. That short rest changes how the cookies spread in the oven. You get crispy golden edges and a soft, chewy center that stays that way even after the cookies cool down. No mixer needed. One bowl does the whole job.
Why You Will Love This Recipe
- No stand mixer needed. A wooden spoon and one large bowl handle everything.
- The 30-minute chill stops the dough from spreading flat and thin in the oven.
- Crispy edges, soft center. The texture stays right for up to five days.
- Freeze the dough balls and bake fresh cookies anytime you want.
- Only 8 ingredients, all simple and easy to find at any grocery store.
- Kids can help with most of the steps, which makes baking this a lot of fun.
Ingredients
For the Cookie Dough:
- 2 and 1/4 cups (280g) all purpose flour
- 1 teaspoon baking soda
- 1 teaspoon fine salt
- 1 cup (225g) unsalted butter, softened to room temperature (not melted)
- 3/4 cup (150g) granulated white sugar
- 3/4 cup (165g) packed light brown sugar
- 2 large eggs, room temperature
- 2 teaspoons pure vanilla extract
- 2 cups (340g) semi-sweet chocolate chips (Ghirardelli semi-sweet chips melt evenly and give a clean chocolate flavor in the finished cookie)
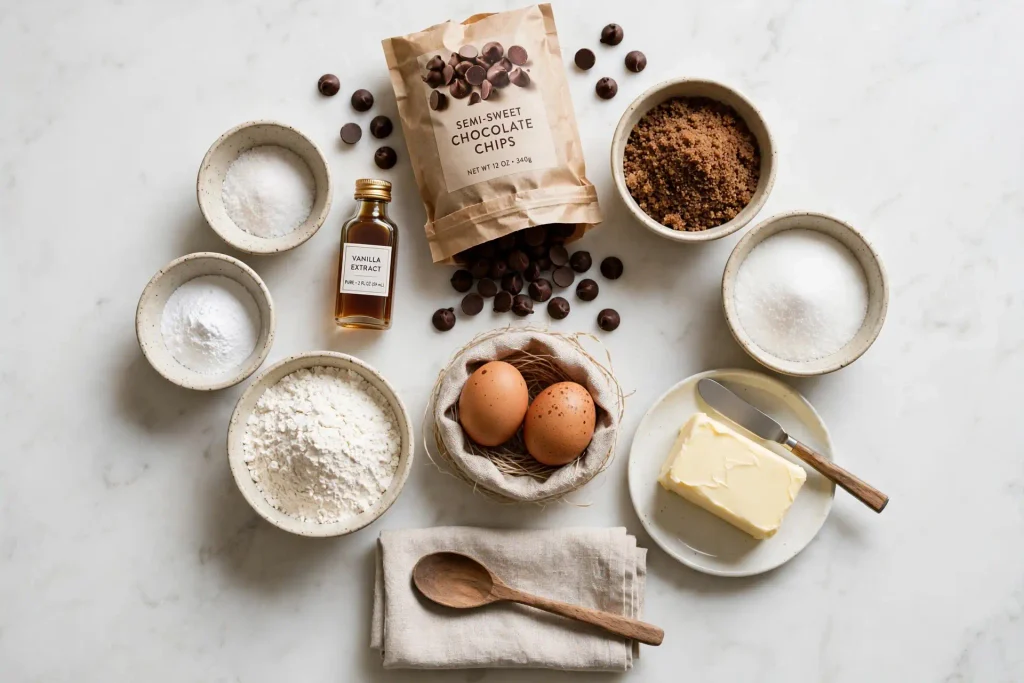
Substitutions for Every Key Ingredient:
- Unsalted butter: Salted butter works fine. Leave out the 1 teaspoon of added salt in the recipe if using it.
- All purpose flour: Bread flour gives an even chewier texture. Use the same weight.
- Semi-sweet chocolate chips: Dark chocolate chips, milk chocolate chips, or roughly chopped chocolate bars all work. Use what you like most.
- Light brown sugar: Dark brown sugar gives a deeper, more caramel-like flavor and slightly darker cookies.
- Each egg: Replace with 3 tablespoons of plain unsweetened yogurt if needed. The cookie will be a little softer.
Allergen and Dietary Disclosure
Contains: Gluten (all purpose flour), dairy (butter), eggs. Semi-sweet chocolate chips may also contain soy as an emulsifier. Check the chip label for any nut cross-contact warnings if a nut allergy is present.
Gluten-Free Option: Replace all purpose flour with Bob’s Red Mill Gluten Free 1 to 1 Baking Flour at the same weight (280g). The cookies will spread a little more and the texture will be slightly softer, but the flavor stays just as good.
Dairy-Free Option: Use vegan butter sticks (not tub spread) in the same amount. Make sure your chocolate chips are also labeled dairy-free.
Egg-Free Option: Replace each egg with 3 tablespoons of plain unsweetened yogurt, or mix 1 tablespoon of ground flaxseed with 3 tablespoons of water, let it sit 5 minutes, and use that per egg.
Nut-Free: This recipe contains no nuts. Check your chocolate chip label for facility cross-contact warnings if a nut allergy is serious.
Disclaimer: Always read your ingredient labels before baking. Formulations and cross-contact risks change by brand and manufacturing facility.
Step-by-Step Instructions
Step 1: Mix the dry ingredients
Put the flour, baking soda, and salt into a medium bowl. Whisk them together for about 30 seconds. Everything should look even with no streaks of white baking soda left. Set this bowl aside.
Step 2: Cream the butter and both sugars
Put the softened butter, granulated white sugar, and packed light brown sugar into a large bowl. Beat them together with a wooden spoon or a hand mixer on medium speed for 2 to 3 minutes. The mixture should look lighter in color and feel airy and soft, not heavy or grainy.
Chef’s Note: Creaming the butter and sugar creates tiny air pockets inside the dough. Those pockets help the cookies rise slightly during baking and stay soft in the middle instead of turning dense.
Step 3: Add the eggs and vanilla
Crack in one egg and stir it in fully before adding the second. Pour in the vanilla extract and stir once more. The batter should look smooth and a little glossy. No yellow streaks of egg should remain.
FOOD SAFETY: Raw cookie dough contains uncooked eggs. Do not taste or eat unbaked dough. Wash your hands after touching raw dough. The cookies are safe to eat only after full baking in the oven.]
Step 4: Add the flour mixture
Pour the flour mixture into the butter mixture. Stir gently until no dry flour is left in the bowl. Stop mixing the moment the flour disappears. Stirring too long after the flour goes in makes the cookies tough instead of soft.
Chef’s Note: The dough will look thick and a little stiff at this stage. That is exactly right. A looser dough spreads too fast in the oven and gives you flat cookies.
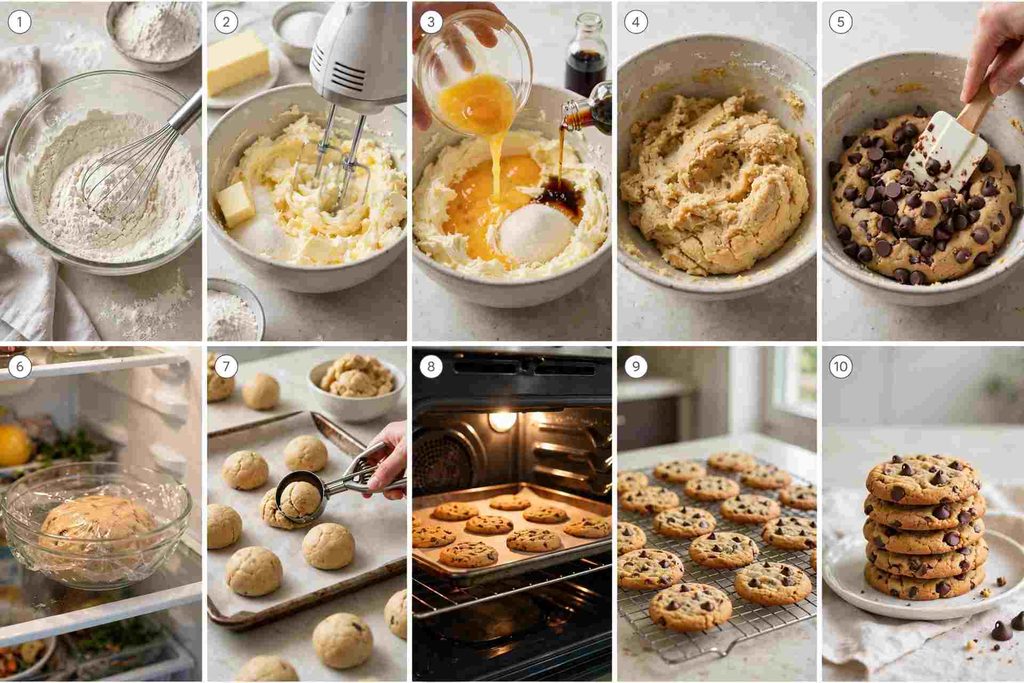
Step 5: Fold in the chocolate chips
Add the chocolate chips to the bowl. Fold them in gently with a spatula. Move the spatula from the bottom of the bowl upward so the chips spread through the whole dough, not just the top.
Step 6: Chill the dough
Cover the bowl tightly with plastic wrap. Put it in the fridge for 30 minutes. This step slows how fast the butter melts in the oven. Slower melting means the cookies stay thicker and come out chewy instead of flat and crispy.
Chef’s Note: If you have extra time, chill the dough for up to 72 hours. The longer it rests, the more the sugars soak into the flour. That rest gives the cookies a deeper, almost caramel-like flavor that one-hour dough cannot match.
Step 7: Heat the oven and prepare the trays
While the dough chills, set your oven to 375F or 190C. Line two baking sheets with parchment paper. Position one oven rack in the upper third of the oven and one in the lower third so both trays bake at the same time.
Step 8: Scoop and space the dough
Take the chilled dough out of the fridge. Use your 2 tablespoon cookie scoop to drop balls of dough onto the lined trays. Leave at least 2 inches of space between each ball. Each tray holds 12 cookies comfortably.
Step 9: Bake until the edges turn golden
Place both trays in the oven at the same time. Bake for 11 to 12 minutes. Watch the edges. When they look set and golden brown, the cookies are ready. The centers will still look slightly soft and underdone. That is correct. Do not wait for the center to look fully baked.
Take Them Out While the Center Still Looks Soft The single biggest mistake home bakers make with chocolate chip cookies is leaving them in the oven too long. A fully baked-looking center in the oven means overcooked edges and a dry, hard cookie once it cools. Pull the tray out when the edges are golden and the center still looks a little wet. The hot tray finishes baking the center in the next 5 minutes while the cookies sit outside the oven.
Step 10: Rest and transfer
Leave the cookies on the hot baking sheet for 5 full minutes after taking them out. They will look too soft to touch at first. That is normal. After 5 minutes, use a spatula to move them to a wire rack. Give them 10 more minutes on the rack and they will hold their shape and texture perfectly.
Expert Tips and Tricks
- Butter softness is the most important thing to get right. Softened butter means it holds its shape but dents when you press it with a finger. If it looks oily or shiny, it is too warm. If you cannot press a dent into it, it is too cold.
- Never skip the chill. Even 20 minutes makes a visible difference in thickness and chew. Thirty minutes is the sweet spot.
- Sprinkle a tiny pinch of flaky sea salt on each cookie ball before baking. It makes the chocolate taste richer and adds a subtle contrast to the sweetness.
- Make-ahead tip: Scoop the dough into balls, freeze them on a parchment-lined tray for 1 hour, then transfer to a sealed freezer bag. Bake straight from frozen at 375F for 14 to 15 minutes.
- Storage tip: Store baked cookies in an airtight container at room temperature for up to 5 days. Tuck one small piece of plain white bread in the container. The cookies absorb moisture from it and stay soft the whole time.
- Always use room temperature eggs. Cold eggs make the softened butter seize up in the bowl. The dough can look curdled and lumpy. Take eggs out of the fridge at least 30 minutes before you start.
Storage Instructions
Room Temperature: Store in an airtight container with a tight-fitting lid for up to 5 days. Place one small piece of plain white bread inside the container. The bread gives off moisture and the cookies absorb it, staying soft the entire time.
Refrigerator: Baked cookies keep well in a sealed container in the fridge for up to 10 days. Take them out 20 minutes before eating so the butter in the cookie softens back to room temperature.
Freezer (baked cookies): Let cookies cool fully. Place them in a single layer in a freezer-safe bag or sealed container. Freeze for up to 3 months. Thaw at room temperature for 30 minutes before eating.
Freezer (unbaked dough balls): Scoop dough into balls, freeze on a lined tray for 1 hour, then transfer to a sealed freezer bag. Freeze for up to 3 months. Bake straight from frozen at 375F and add 2 to 3 extra minutes to the bake time.
Reheating: Place one cookie on a small microwave-safe plate. Microwave for 10 to 15 seconds. The chocolate chips will turn soft and melty and the cookie will taste freshly baked. Do not heat for more than 20 seconds or the edges get hard.
Make-Ahead Notes: Make the full dough up to 72 hours ahead. Keep it covered in the fridge. You can also pre-scoop the balls and refrigerate them on a lined tray covered with plastic wrap, ready to slide into the oven anytime.
Variations and Substitutions
Spicy Version: Add half a teaspoon of cayenne pepper and 1 teaspoon of ground cinnamon to the flour mixture before mixing. The spice is quiet in the finished cookie but gives a warm background note that makes the chocolate chips taste richer.
Double Chocolate Version: Replace 1/4 cup (30g) of the all purpose flour with 1/4 cup (25g) of natural unsweetened cocoa powder. The cookies turn deep brown and taste like a brownie-cookie cross. A good choice for anyone who wants more chocolate in every bite.
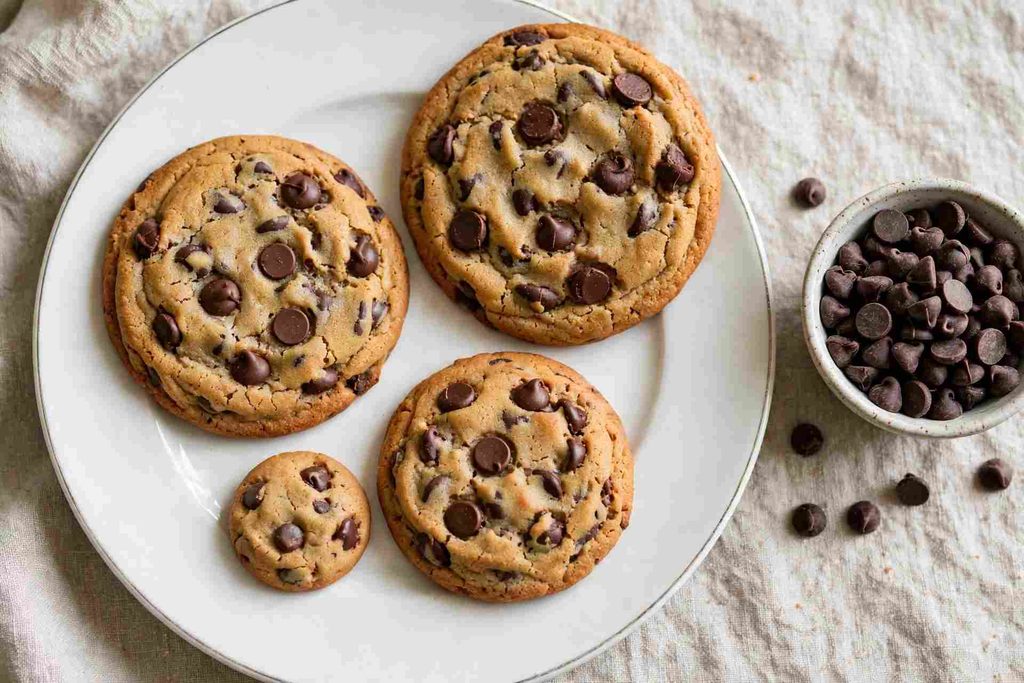
Kid-Friendly Mini Version: Use a 1 tablespoon scoop instead of a 2 tablespoon scoop. Bake at 375F for 8 to 9 minutes. The smaller cookies are softer, easier for small hands to hold, and bake through quickly. Great for school lunchboxes or birthday party plates.
Gluten-Free Version: Swap the all purpose flour for Bob’s Red Mill Gluten Free 1 to 1 Baking Flour at the exact same weight. Chill the dough for 45 minutes and space the balls a little wider on the tray. The color and flavor stay the same. The texture is slightly softer and more tender.
What to Serve With This
Cold milk: The most natural pairing for chocolate chip cookies. Cold milk balances the sweetness of the chips and cuts through the richness of the butter in every bite.
Vanilla ice cream sandwich: Press a scoop of vanilla ice cream between two room temperature cookies. Wrap each sandwich in parchment paper and freeze for 2 hours before serving. The cookies soften slightly and the result is something worth making for a weekend treat.
Hot chocolate: A mug of thick hot chocolate next to a small plate of cookies makes a simple but satisfying cold-weather snack. The slight bitterness of good cocoa powder balances the sweetness of the cookies very well.
Fresh raspberries or strawberries: A handful of fresh berries on the side adds tartness that cuts through the rich buttery cookie. No prep needed. Just rinse and serve alongside.
Nutrition Information
| Calories per Serving: | Approximately 180 |
| Protein: | 2g |
| Carbs: | 23g |
| Fat: | 9g |
| Fiber: | 1g |
| Sugar: | 14g |
| Sodium: | 95mg |
| Serving Size: | 1 cookie |
| Servings per Recipe: | 24 |
Most of the calories in each cookie come from the butter, sugar, and chocolate chips. The eggs and flour add a small amount of protein and fiber. If you want to reduce the overall sugar, cut both the white and brown sugar by 2 tablespoons each. The cookies will be slightly less sweet and a little less golden on the edges, but the texture stays the same.
Disclaimer: Nutrition values are approximate and calculated per serving using standard ingredient amounts. Values may vary based on brands used and portion sizes.
Why Brown Sugar Makes Cookies Chewier Than White Sugar Brown sugar has molasses mixed into it. Molasses holds onto moisture much better than plain white sugar does. That extra moisture is what keeps the center of your chocolate chip cookies soft and chewy long after they come out of the oven. White sugar gives spread and a crispy bite. Brown sugar gives chew and a caramel-like flavor. Using both together in equal amounts gives you the best of what each one does.
Follow on pinterest for new updates at Beyaskitchen
Frequently Asked Questions
Can I make chocolate chip cookie dough ahead of time?
Yes, and the cookies taste better when you do. Make the full dough, roll it into balls, and store them in a sealed container in the fridge for up to 72 hours. The longer rest lets the sugars soak into the flour slowly, which creates a deeper, almost caramel-like flavor in the baked cookie. You can also freeze the dough balls for up to 3 months and bake straight from frozen at 375F, adding 2 to 3 extra minutes to the bake time.
Why do my chocolate chip cookies always come out flat?
Flat cookies happen for one of three reasons. The butter was too warm or melted before creaming. The dough was not chilled before baking. Or the baking sheet was still warm from the previous batch when you placed fresh dough on it. Fix all three: use butter that holds its shape but dents when pressed, chill the dough for a full 30 minutes, and let your baking sheets cool completely between batches. All three changes together fix flat cookies most of the time.
Can I use salted butter instead of unsalted?
Yes, with one small adjustment. Leave out the 1 teaspoon of salt listed in the recipe. The salt already in the butter is enough to season the dough. Different brands add different amounts of salt, so results will vary slightly between batches. If the first tray tastes a little too salty, skip the extra salt entirely on the next round.
How do I know when the cookies are done baking?
Watch the edges, not the center. When the outer edge of each cookie looks golden and set, the cookies are done. The center will still look soft and slightly underbaked at that point. That is correct. Take the tray out and leave the cookies on it for 5 minutes. The heat from the hot tray carries over and finishes the center without drying out the edges. Waiting until the center looks done inside the oven always results in hard, overbaked cookies after cooling.
My cookies spread too much, what did I do wrong?
Three things usually cause this. The butter was too warm and soft when you started mixing. The dough was not chilled before scooping. Or the baking sheet was warm from the last batch when you placed fresh dough on it. Check that your butter dents easily but still holds its shape before you start. Chill the dough for the full 30 minutes. And always cool your baking sheets between batches by rinsing them under cold water and drying them before reloading.
Conclusion
Chocolate chip cookies are not hard once you know what makes them work. Softened butter. Chilled dough. A quick pull from the oven while the center still looks soft. Those three things together are the whole recipe.
Try a batch this weekend. The first tray will teach you something. The second will be exactly what you pictured.
If you loved this chocolate chip cookies recipe, save it to your Baking Recipes Pinterest board so you can fin
Get updates of new recipes visit: Beyas kitchen
Soft and Chewy Chocolate Chip Cookies
Ingredients
Method
- Whisk flour, baking soda, and salt together in a medium bowl. Set aside.
- In a large bowl, beat softened butter with both sugars for 2 to 3 minutes until light and airy.
- Add eggs one at a time, mixing fully after each. Add vanilla and stir until smooth with no streaks.
- Pour in the flour mixture. Stir gently until no dry flour remains. Stop immediately.
- Fold in chocolate chips until they are spread evenly through the dough.
- Cover the bowl with plastic wrap and chill in the fridge for 30 minutes.
- Heat oven to 375F or 190C. Line two baking sheets with parchment paper.
- Scoop 2 tablespoon balls of dough onto the trays, spaced 2 inches apart, 12 per tray.
- Bake 11 to 12 minutes until edges are golden. Centers will still look slightly soft. That is correct.
- Rest on the tray for 5 minutes. Transfer to a wire rack for 10 more minutes before eating.
Notes
- Always chill the dough for 30 minutes. This stops spreading and gives you thick, chewy cookies every time.
- Pull cookies out when the center still looks soft. They finish on the hot tray outside the oven.
- Butter should dent when pressed but not look oily. That is the right softness for this recipe.