Easy Black Forest Cake with Cherries and Cream
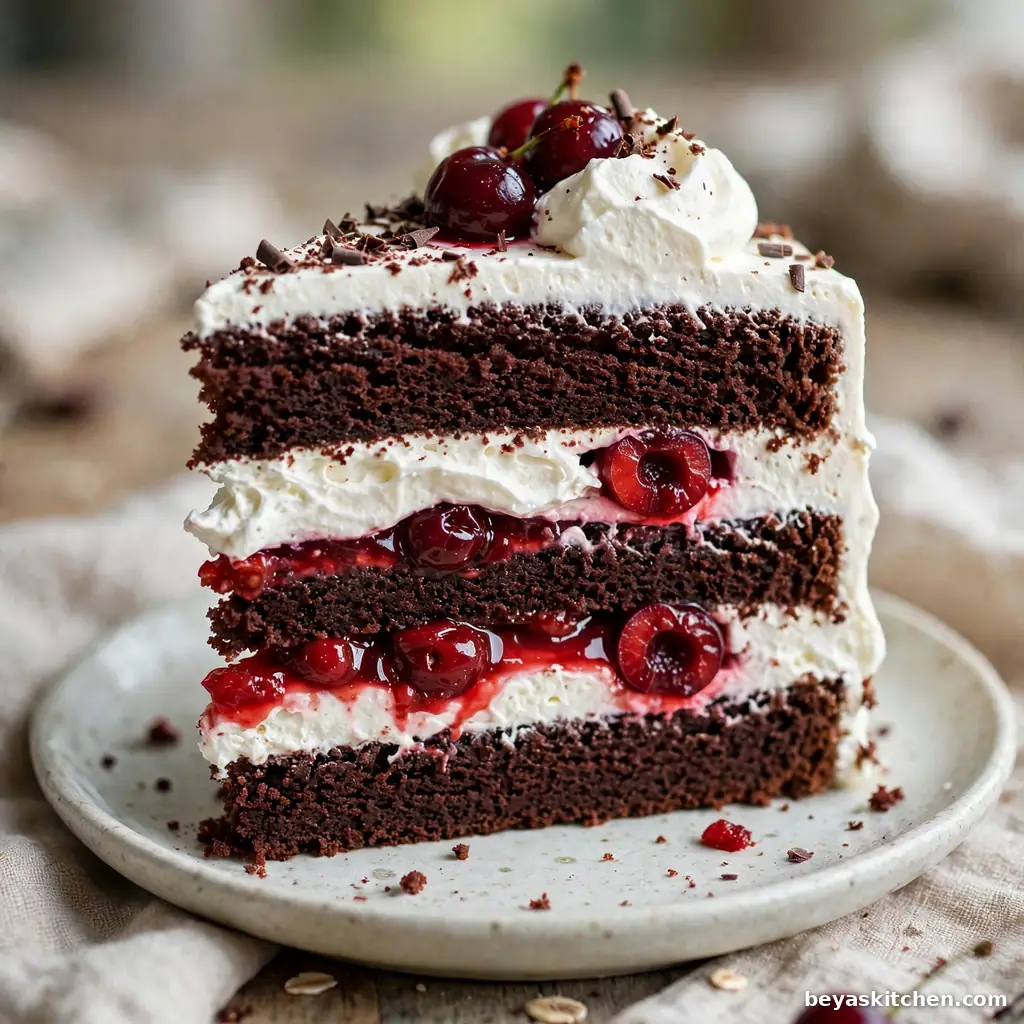
Black forest cake is the cake people ask for by name. Dark chocolate layers, a juicy cherry filling, and soft white cream come together in one tall, rich slice. This version keeps every classic part and leaves the alcohol out for good. The cherries rest in their own sweet juice, so the taste stays deep and bright. Nothing here is hard to find, and each step stays plain and calm.
Why You Will Love This Recipe
- Dark chocolate layers that bake soft and stay moist for days
- A real cherry filling with no alcohol at all
- Whipped cream that holds firm peaks and slices clean
- Chocolate shavings give a bakery look in just minutes
- The cherry taste grows deeper and better on day two
Ingredients
For the Chocolate Layers:
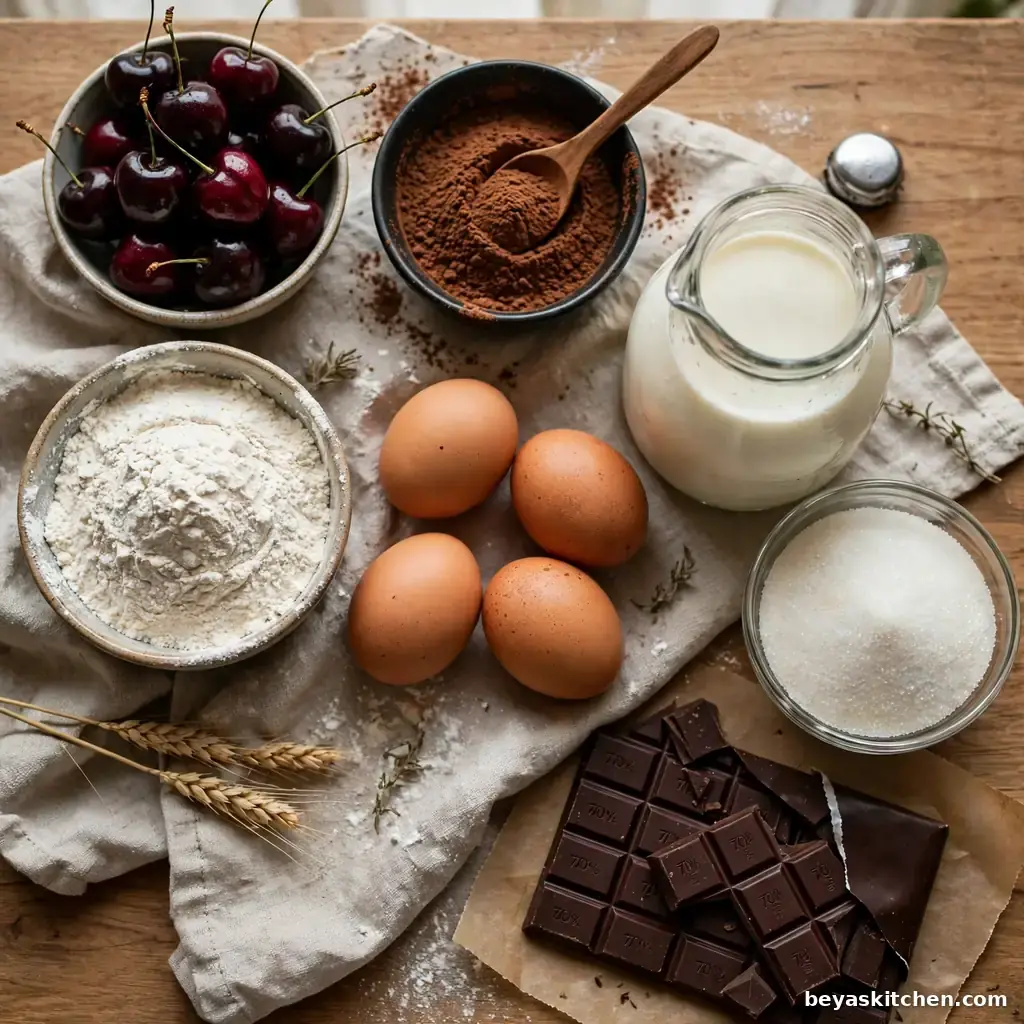
- 2 cups all purpose flour, spooned into the cup and leveled (swap: a 1 to 1 gluten free baking blend in the same amount)
- 2 cups granulated sugar
- 3/4 cup unsweetened cocoa powder, Ghirardelli if you can get it, since deep cocoa gives the dark color and rich taste (swap: any plain unsweetened cocoa powder)
- 2 teaspoons baking soda
- 1 teaspoon baking powder
- 1 teaspoon fine salt
- 2 large eggs, at room temperature
- 1 cup whole milk, at room temperature (swap: 2 percent milk in the same amount)
- 1/2 cup neutral oil, like sunflower or canola, which keeps the crumb moist
- 2 teaspoons alcohol free vanilla extract
- 1 cup hot water (swap: hot coffee, which makes the chocolate taste even deeper)
For the Cherry Filling:
- 2 cans (15 ounces each) dark sweet cherries in juice, drained well, with the juice saved (swap: one 24 ounce jar of cherries in juice)
- 3/4 cup of the saved cherry juice, plus a few extra spoons for brushing the layers
- 1/4 cup granulated sugar
- 2 tablespoons cornstarch
- 1 tablespoon fresh lemon juice
For the Whipped Cream:
- 3 cups heavy whipping cream, very cold
- 1/2 cup powdered sugar, sifted so no lumps stay
- 2 tablespoons cornstarch, which helps the cream hold firm peaks for hours
- 2 teaspoons alcohol free vanilla extract
To Finish:
- 4 ounces dark chocolate, shaved into curls with a peeler (swap: milk chocolate for a softer, sweeter taste)
- 12 fresh cherries with stems, or 12 drained canned cherries dried well on a towel
Cherry Juice Does the Work of the Liqueur
Old recipes soak this cake with cherry liqueur. This one uses the juice from the cherry jar, cooked into the filling and brushed on each layer. You get the same deep cherry taste in every bite, and the whole cake stays safe for kids and guests who skip alcohol.
Allergen and Dietary Disclosure
Contains: gluten, dairy, and eggs. The chocolate bar may carry soy, so read its label if soy is a concern.
Gluten Free Option: swap the flour with a 1 to 1 gluten free baking blend, and let the mixed batter rest for 10 minutes before it goes into the pans.
Dairy Free Option: use oat milk in the layers and a plant based whipping cream that whips up firm. The cherry filling stays the same.
Nut Free: the base recipe has no nuts at all. If nuts are a real risk, pick chocolate made in a nut free plant.
Egg Free Option: not simple for these layers, since the eggs give lift and hold. An egg free chocolate cake base can be used, but the crumb feels a bit more dense.
Disclaimer: Always confirm ingredients with your specific brand labels, as formulations vary by manufacturer.
Step-by-Step Instructions
Step 1: Heat the oven to 350°F (175°C). Rub soft butter inside three 8 inch round pans, set a circle of baking paper in the bottom of each one, butter the paper, and dust the pans with cocoa powder.
Step 2: Whisk the flour, sugar, cocoa powder, baking soda, baking powder, and salt in a large bowl until the mix looks even and dark.
Step 3: Add the eggs, milk, oil, and vanilla to the dry mix. Beat for 2 full minutes, until the batter turns smooth and glossy. Food safety note: the batter holds raw egg, so keep fingers and spoons out of the bowl until the cake is baked.
Step 4: Pour in the hot water a little at a time and stir until it blends in. The batter will look thin, and that is just right for this cake.
Chef’s Note: Hot water wakes up the cocoa and gives the deep, dark color. A thin batter is the secret here; it bakes into soft, moist layers instead of a dry, heavy crumb.
Step 5: Split the batter evenly between the three pans. Bake for 28 to 32 minutes, until the top springs back under a soft finger press and a toothpick in the center comes out clean, with one or two soft crumbs.
Step 6: Rest the pans on a rack for 10 minutes. Run a thin knife around the edges, turn the layers out, peel off the paper, and let them cool fully, about 1 hour.
Step 7: Stir the saved cherry juice, sugar, and cornstarch in a small pot until smooth. Heat on medium, stir the whole time, and cook until the mix turns thick and glossy, about 2 minutes at a gentle boil. Take the pot off the heat and stir in the drained cherries and the lemon juice. Let the filling cool fully.
Chef’s Note: Cook the filling until it looks thick, like jam. A thin filling soaks away into the crumb and lets the layers slide when you cut the cake.
Step 8: Pour the cold cream into a cold bowl. Add the powdered sugar, cornstarch, and vanilla. Whip until firm peaks stand up when you lift the beaters, about 3 to 4 minutes. Stop there; more whipping turns cream grainy.
Chef’s Note: Cornstarch is the quiet helper in this cream. It holds the peaks firm for hours, so the cake can sit on the table at a party and still slice clean.
Step 9: Set the first layer on a plate. Brush it with 2 to 3 tablespoons of cherry juice, spread about 3/4 cup of cream over it, and spoon half of the cherry filling on top. Lay the second layer on, brush it with juice, and repeat with cream and the rest of the filling. Add the third layer and brush it with juice.
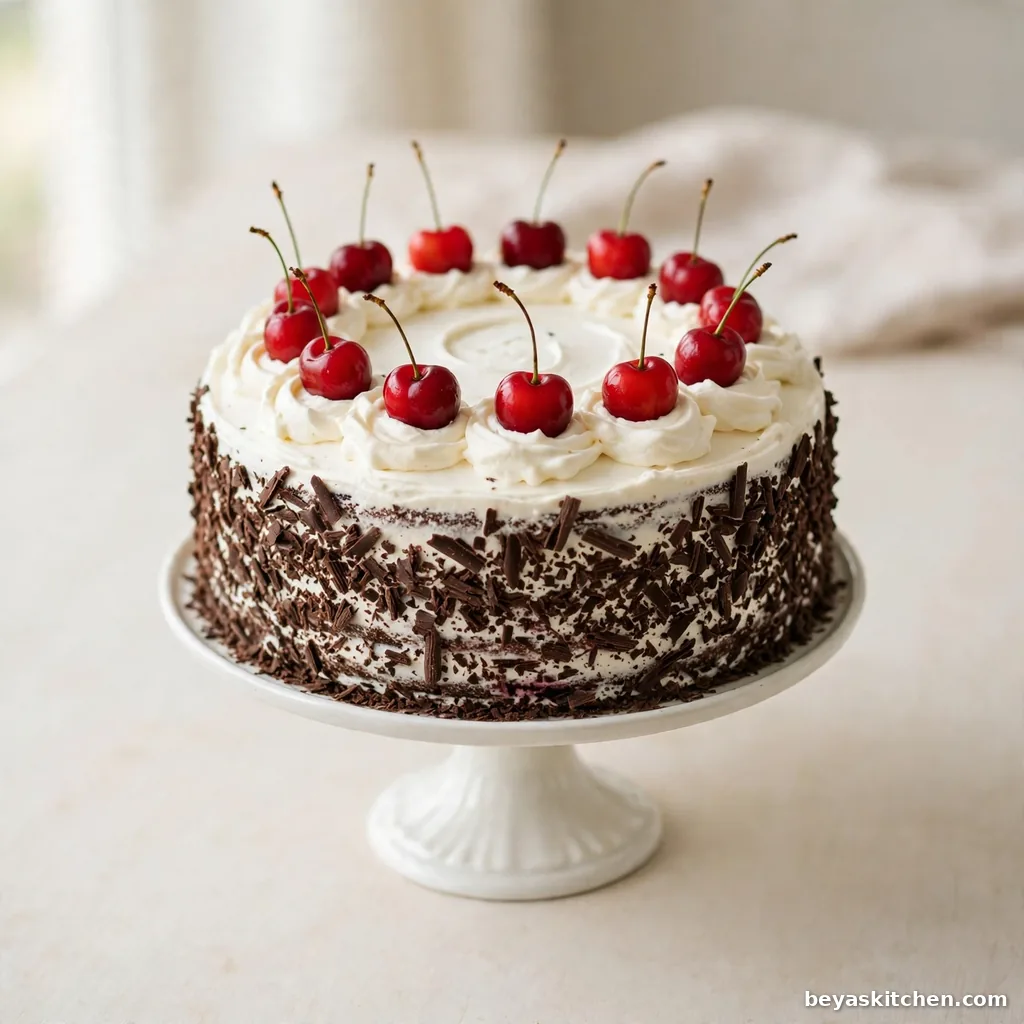
Step 10: Spread the rest of the cream over the top and sides of the cake in soft swirls. Press the chocolate shavings onto the sides with a flat hand, and scatter a few on top. Set the 12 cherries in a ring on the top edge.
Step 11: Chill the cake for at least 1 hour before you slice it. Cut with a long knife that you dip in hot water and wipe dry between slices. Food safety note: this cake holds fresh whipped cream, so keep it in the fridge and never leave it out for more than 2 hours.
Expert Tips and Tricks
- Chill the bowl and the beaters for 15 minutes before you whip. Cold tools give firm peaks fast.
- Shave the chocolate bar with a plain vegetable peeler for wide, pretty curls.
- Brush the layers with juice while they are cool, not warm, so the cream does not melt on contact.
- Make ahead tip: bake the layers one day early, wrap them tight, and keep them in the fridge. Cold layers stack neat and crumb far less.
- Storage tip: keep the built cake in the fridge, covered, for up to 3 days. The cherry taste grows deeper by day two.
Allergen-Specific Cooking Notes
Gluten free layers feel a bit more delicate, so cool them in the pans for the full 10 minutes and lift with two hands. Plant whipping creams vary by brand, so whip a small test spoon first; if it stays soft, fold in one more tablespoon of cornstarch.
Storage Instructions
Room Temperature: Not recommended. The whipped cream must stay cold, so the cake goes back into the fridge as soon as you serve.
Refrigerator: Up to 3 days in a covered cake box or a tall sealed container. Keep it away from strong smelling foods, since fresh cream picks up odors fast.
Freezer: Single slices freeze well for up to 1 month. Wrap each slice in plastic wrap, then in foil, and thaw it in the fridge overnight.
Reheating: None. Serve the cake cold from the fridge, or rest a slice on the counter for 15 minutes so the chocolate crumb softens a bit.
Make-Ahead Notes: The plain layers keep 1 day in the fridge or 1 month in the freezer, wrapped tight. The cherry filling keeps 3 days in the fridge. Whip the cream and build the cake on the day you serve it, or one day before at most.
Chill Before You Slice
Give the built cake one full hour in the fridge before the first cut. The cold firms the cream, sets the cherry filling, and locks the layers in place. A rushed cut is the top reason slices lean and slide, and one calm hour fixes it.
Variations and Substitutions
Black Forest Cupcakes: Fill two cupcake pans with the batter and bake for 18 to 22 minutes. Spoon a little cherry filling on top of each one, swirl on the cream, and finish with one cherry.
Kid Friendly Milk Chocolate: Swap the dark chocolate shavings for milk chocolate curls and add a few extra cherries on top. The taste turns softer and sweeter, which suits young eaters well.
Black Forest Sheet Cake: Pour the batter into a buttered 9 by 13 inch pan and bake for 35 to 40 minutes. Spread the cherry filling and the cream on top in one layer, with no stacking.
White Forest Cake: Bake a plain vanilla layer cake as the base and swap the dark shavings for white chocolate curls. Keep the same cherry filling and cream for a light twin of the classic.
What to Serve With This
Hot Coffee: The bitter edge of a plain cup loves dark chocolate and cuts the sweet cream.
Black Tea: A simple hot cup keeps the plate balanced and suits a slow afternoon slice well.
Vanilla Ice Cream: One cold scoop next to a slice turns the plate into a full party dessert.
Cold Milk: A plain glass keeps young guests happy and cools the rich cocoa taste between bites.
Nutrition Information
| Calories per Serving | approximately 480 |
| Protein | 6 g |
| Carbs | 58 g |
| Fat | 26 g |
| Fiber | 3 g |
| Sugar | 42 g |
| Sodium | 280 mg |
| Serving Size | 1 slice, one twelfth of the cake |
| Servings per Recipe | 12 |
Disclaimer: Nutrition values are approximate and calculated per serving using standard ingredient amounts. Values may vary based on brands used and portion sizes.
Follow on Pinterest for new updates at Beyaskitchen
Frequently Asked Questions
1. What can I use instead of kirsch in black forest cake?
Use the juice from the cherry jar. It keeps the crumb moist and adds real cherry taste in each bite.
2. Can I make black forest cake a day ahead?
Yes, and the taste is even better the next day. Build the full cake, cover it, and keep it in the fridge for 1 day before the party.
3. Why did my whipped cream turn soft and runny?
Warm cream is the main cause. Chill the bowl and beaters first, and whip just to firm peaks.
4. How do I know the chocolate layers are done baking?
Look for three signs at 28 to 32 minutes. The top springs back when you press it, and a toothpick in the center comes out clean.
5. Why do my cake layers slide apart when I slice?
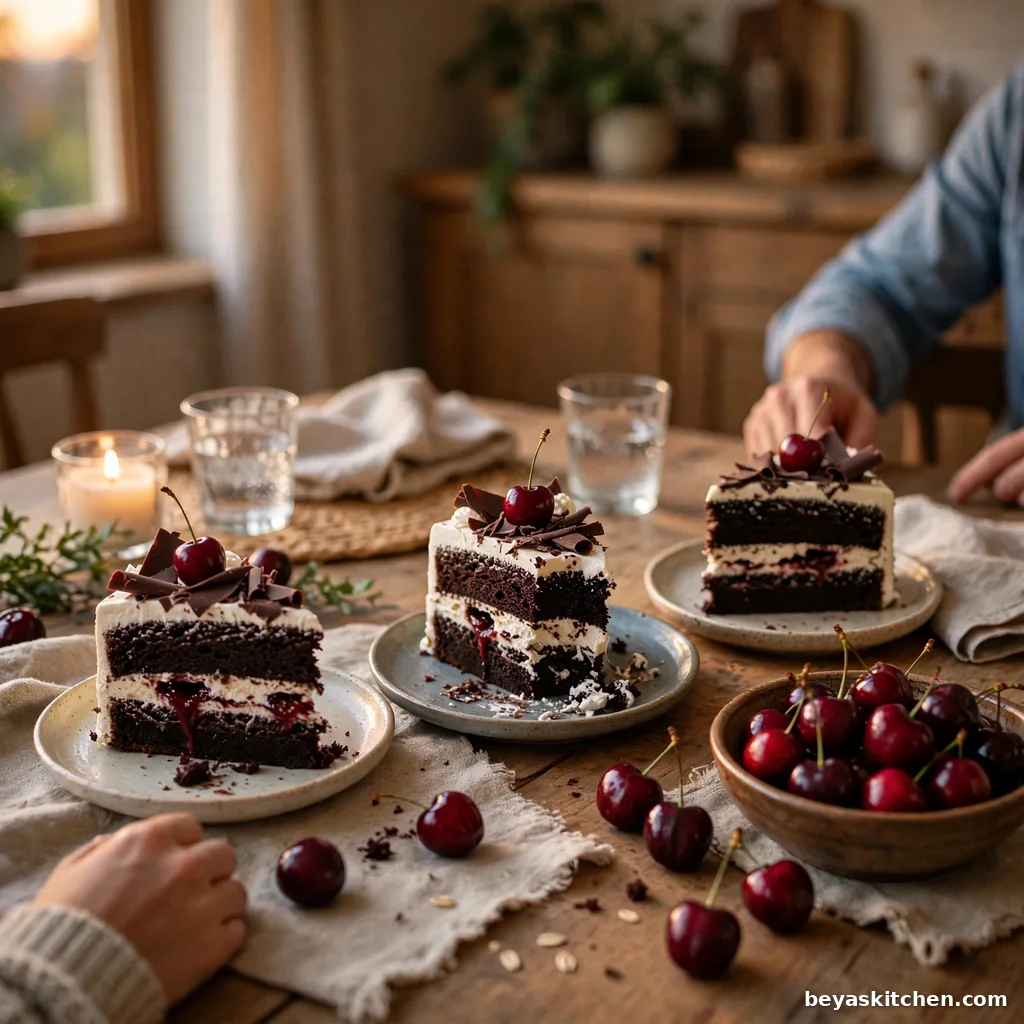
The filling was too thin, or the cake was cut before it chilled. Cook the cherry filling until it looks thick like jam, and chill the built cake for a full hour before the first cut.
Conclusion
A tall black forest cake looks like hard work, but it rests on plain habits: moist chocolate layers, a jam thick cherry filling, and cold, firm cream. Keep those three things right, and the slices stand straight and proud. Bake this black forest cake for the next birthday at your table, and watch the plates come back empty. If you loved this recipe, save it to your celebration cakes Pinterest board so you can find it easily later.
Get more updates at: beyaskitchen
Black Forest Cake
Ingredients
Method
- Heat the oven to 350°F (175°C). Butter three 8 inch round pans, line the bottoms with baking paper, butter the paper, and dust with cocoa powder.
- Whisk the flour, sugar, cocoa powder, baking soda, baking powder, and salt in a large bowl.
- Add the eggs, milk, oil, and vanilla. Beat for 2 minutes, until smooth and glossy.
- Stir in the hot water a little at a time. The batter will be thin, and that is right.
- Split the batter between the pans. Bake 28 to 32 minutes, until the top springs back and a toothpick in the center comes out clean.
- Rest the pans 10 minutes, turn the layers out, peel off the paper, and cool fully, about 1 hour.
- Stir the cherry juice, sugar, and cornstarch in a small pot. Heat and stir until thick and glossy, about 2 minutes at a gentle boil. Off the heat, stir in the cherries and lemon juice. Cool fully.
- Whip the cold cream with the powdered sugar, cornstarch, and vanilla until firm peaks stand, about 3 to 4 minutes.
- Set the first layer on a plate. Brush with cherry juice, spread about 3/4 cup of cream, and spoon on half the cherry filling. Repeat with the second layer. Top with the third layer and brush it with juice.
- Cover the cake with the rest of the cream. Press chocolate shavings onto the sides, scatter a few on top, and set the 12 cherries in a ring on top.
- Chill at least 1 hour before slicing. Cut with a long knife dipped in hot water and wiped dry between slices.