Easy Hummus Recipe, Smooth and Creamy Every Time
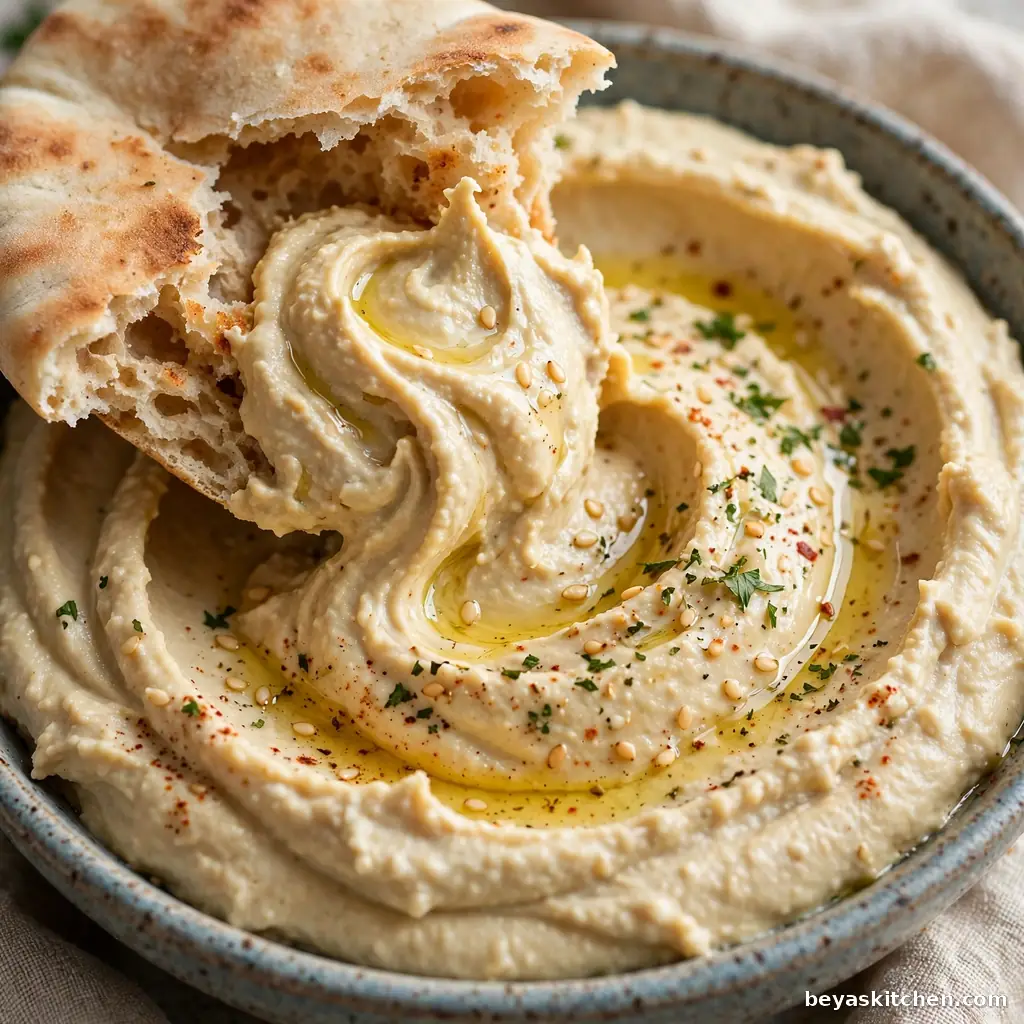
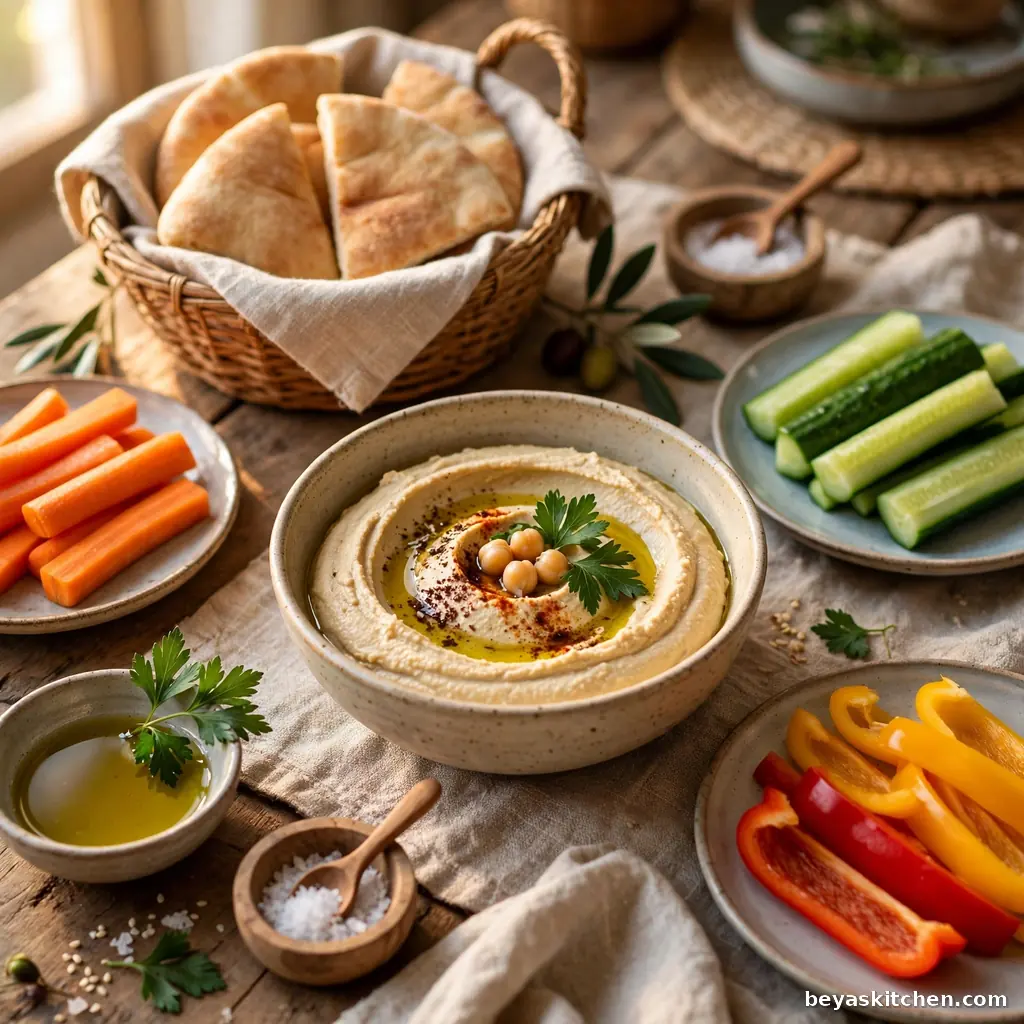
This hummus recipe gives you a bowl of smooth, creamy hummus that tastes far better than any tub from the store. The secret is simple: whip the tahini first, add the chickpeas in two parts, and blend a little longer than you think you should. A few spoons of ice water make the whole bowl light and fluffy. There is no cooking at all, just a food processor and about 15 minutes of your time. The taste is bright from the lemon, rich from the tahini, and silky from the olive oil. Set it out with warm pita and fresh vegetable sticks, and watch the bowl empty fast.
Why You Will Love This Recipe
- Ready in about 15 minutes, with no stove and no oven.
- Smooth and fluffy, not thick and grainy like many home versions.
- Costs far less than store bought tubs, from plain pantry foods.
- Keeps well in the fridge for up to 5 days, so snacks stay easy all week.
- Simple to change: add spice, roasted peppers, or extra lemon.
- A kind Ziyad tahini that pours like a sauce blends far smoother than a thick, dry paste.
Ingredients
For the Hummus:
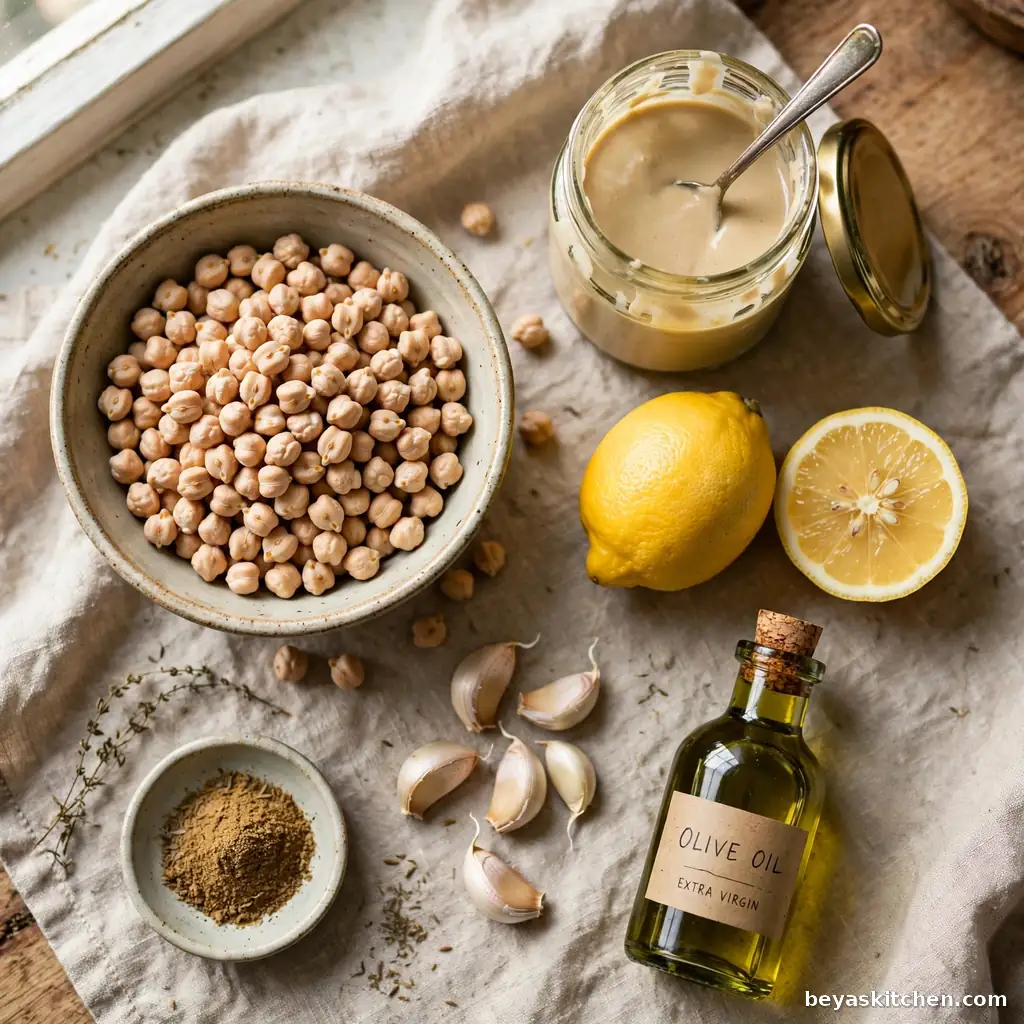
- 1 can (15 ounces) chickpeas, drained, with 1/4 cup of the can liquid saved (or 1 1/2 cups cooked chickpeas)
- 1/2 cup tahini, well stirred before you measure it
- 3 tablespoons fresh lemon juice, from 1 large lemon, plus more to taste
- 1 small garlic clove, minced fine
- 1/2 teaspoon ground cumin
- 1/2 teaspoon fine salt, plus more to taste
- 2 to 4 tablespoons ice water, as needed for blending
- 2 tablespoons extra virgin olive oil
For the Top:
- 2 tablespoons whole chickpeas, saved from the can before blending
- 1 tablespoon extra virgin olive oil, for drizzling
- 1/4 teaspoon sweet paprika or sumac
- 1 tablespoon chopped fresh parsley
Ingredient Notes:
Tahini does most of the work in this bowl, so pick a jar that pours easily when you stir it. A dry, clumpy tahini makes heavy hummus. Fresh lemon juice tastes bright and clean, while the bottled kind can taste flat. Raw garlic grows stronger as the hummus rests, so one small clove is plenty at the start. You can always add more lemon or salt at the end, but you cannot take them out.
Allergen and Dietary Disclosure
Contains: Sesame, from the tahini. Sesame is the main allergen in this bowl, and it is a major allergen for many people. Always tell guests that this hummus contains sesame before you serve it. Chickpeas are a legume, and tahini jars are sometimes packed in plants that also handle tree nuts, so read the jar label with care.
Sesame-Free Option: Leave the tahini out and add 2 extra tablespoons of olive oil plus 2 tablespoons of the saved chickpea liquid. The hummus still blends smooth, but the taste will be lighter and less rich. Only this version is free of sesame.
Gluten-Free Option: The hummus itself has no gluten at all. Serve it with gluten free pita or with fresh vegetable sticks instead of wheat bread.
Dairy-Free Option: This recipe uses no dairy in any form, so no swap is needed.
Nut-Free: This recipe uses no nuts. Still check your tahini label, since some brands share equipment with tree nuts.
Egg-Free Option: There are no eggs in this recipe, so no swap is needed.
Always confirm ingredients with your specific brand labels, as formulations vary by manufacturer.
Step-by-Step Instructions
Step 1: Drain the can of chickpeas over a bowl and save 1/4 cup of the liquid. Set 2 tablespoons of whole chickpeas aside for the top. Rinse the rest of the chickpeas under cold water and let them drain well.
Chef’s Note: For the smoothest bowl of all, rub the rinsed chickpeas in a clean kitchen towel for a minute. Many of the thin skins slip off, and the hummus blends silky. It is a small step, but it makes a real change.
Step 2: Put the tahini, lemon juice, and 2 tablespoons of ice water in the food processor. Blend for 1 full minute. The mix should turn pale, thick, and whipped, like a soft cream.
Chef’s Note: Whipping the tahini first is the big secret of fluffy hummus. It traps tiny air bubbles before the heavy chickpeas go in. If you add everything at once, the bowl comes out dense and pasty.
Step 3: Add the minced garlic, cumin, and salt to the whipped tahini. Blend for 30 seconds more. Scrape down the sides of the bowl with a spatula so nothing hides in the corners.
Step 4: Add half of the chickpeas and blend for 1 minute. Scrape the sides again, then add the rest of the chickpeas. Blend for 1 to 2 minutes more, until the hummus looks smooth with no whole pieces left.
Chef’s Note: Adding the chickpeas in two parts keeps the machine from struggling and gives a finer blend. Most home hummus fails at this step because the blending stops too soon. Let it run longer than feels normal.
Step 5: With the machine running, pour in the olive oil in a slow stream. Add ice water or the saved chickpea liquid, one tablespoon at a time, until the hummus turns soft and light. It should fall from a spoon in a slow ribbon.
Step 6: Stop and taste. Add more salt or lemon juice, a little at a time, and blend for a few seconds after each change. The lemon should taste bright, not sour, and the salt should lift the chickpea flavor.
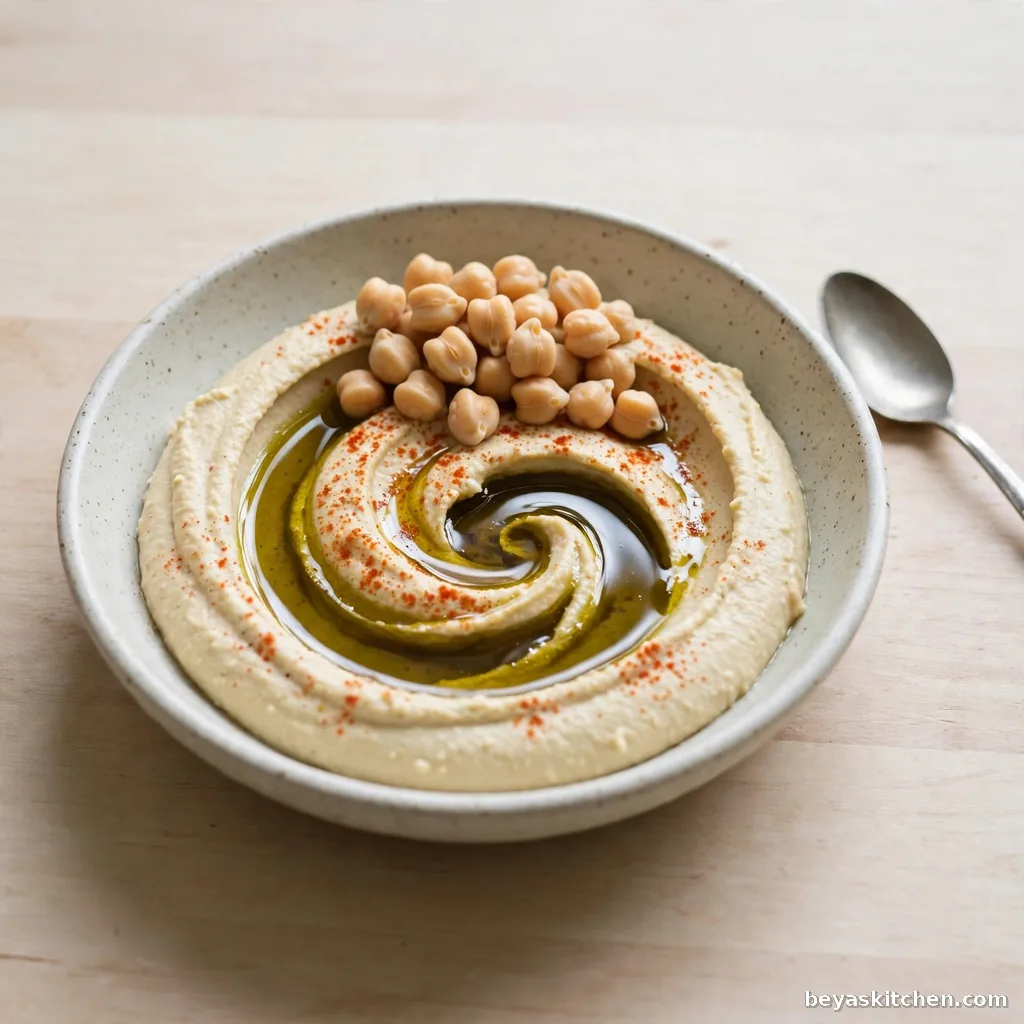
Step 7: Spoon the hummus into a shallow bowl. Use the back of the spoon to make a wide swirl on top. Drizzle with olive oil, then scatter the saved whole chickpeas, paprika, and parsley over the top. Serve at once with warm pita.
Food safety note: Chickpeas from a can are already cooked, so no cooking is needed. Like all dips, hummus should not sit out at room temperature for more than 2 hours. Keep the bowl chilled until you serve it, and put leftovers back in the fridge right after the meal.
Expert Tips for the Best Hummus
- Stir the tahini jar very well before you measure. The oil rises to the top, and a dry scoop from the bottom makes grainy hummus.
- Keep a small glass of ice water next to the processor. Cold water whips into the tahini better than room temperature water.
- Blend one full minute longer than you think you need. Smooth hummus is mostly a matter of time in the machine.
- Start with one small garlic clove. Raw garlic gets stronger as the hummus rests, and a big clove can take over the whole bowl.
- Warm your pita in a dry pan for 30 seconds per side. Warm bread makes the dip taste fresher and softer.
- Make the hummus a day ahead when you can. The flavors settle and blend overnight, and the taste turns deeper and rounder.
- Store leftovers in the fridge for up to 5 days in a sealed container, with a thin film of olive oil on top to keep the surface soft.
Whip the Tahini First, Always
If you remember one thing from this page, make it this. The tahini, lemon, and ice water must be whipped on their own before anything else goes in. This one minute builds the light base that carries the whole bowl. Restaurants that are famous for their hummus all share this step. It costs you nothing but a minute, and it is the gap between a heavy paste and a cloud soft dip.
Storage Instructions
Room Temperature: Not recommended. Hummus should not sit out for more than 2 hours. Move leftovers to the fridge as soon as the meal ends.
Refrigerator: Store in a sealed container for up to 5 days. Smooth the top flat and pour a thin film of olive oil over it before you close the lid. The oil keeps the surface from drying and darkening.
Freezer: Freeze in a freezer safe container for up to 3 months. Leave a little space at the top, since the hummus grows a bit as it freezes. Thaw it in the fridge overnight, then stir well with a spoon of water and a drizzle of olive oil to bring back the smooth feel.
Reheating: Hummus is not reheated. Take it out of the fridge 20 to 30 minutes before serving so it loses its chill, then stir it well. Cold hummus tastes flat, while a cool room temperature bowl tastes rich and bright.
Make-Ahead Notes: You can make the full recipe 1 day ahead for the best flavor. Keep the toppings off until serving time so the oil swirl and parsley look fresh. The drained chickpeas and saved liquid can also wait in the fridge for 1 day before blending.
Variations and Substitutions
Spicy Hummus: Add 1/2 teaspoon of red pepper flakes or a small pinch of cayenne with the garlic. Blend well, then top the bowl with a little chili oil if you have it. The heat builds slowly under the lemon.
Roasted Red Pepper Hummus: Blend in 1 roasted red pepper from a jar, drained and patted dry. The color turns a warm orange red, and the taste turns sweet and smoky. Add the pepper in Step 4 with the second half of the chickpeas.
Extra Lemon and Herb Hummus: Add 1 extra tablespoon of lemon juice and blend in 1/4 cup of fresh parsley leaves. The bowl turns a soft green and tastes bright and fresh, a fine pick for spring meals.
Avocado Hummus: Add 1 ripe avocado in Step 5 and blend until smooth. The hummus turns extra creamy and pale green. Serve this version the same day, since avocado darkens as it sits.
Kid-Friendly Mild Hummus: Skip the garlic and cumin, and cut the lemon juice to 2 tablespoons. The taste stays soft and plain, and small kids who dislike strong flavors usually eat it without a fuss.
Ice Water Is the Fluffy Trick
Plain water works in hummus, but ice water works better. The cold helps the tahini whip into a lighter foam, and the finished bowl feels airy instead of dense. Add it one spoon at a time, since you can always add more but you cannot take it back. If your hummus ever feels too thick the next day, stir in one spoon of ice water and it wakes right back up.
What to Serve With This Hummus
Warm Pita Bread: The classic partner. Soft warm pita scoops cleanly and carries the lemon and garlic taste in every bite.
Fresh Vegetable Sticks: Carrot, cucumber, and bell pepper sticks add crunch and color. Their fresh taste cuts through the rich tahini in a pleasant way.
Falafel Wraps: Spread a thick layer inside a warm wrap before you add falafel and salad. The hummus keeps the wrap moist and adds protein at the same time.
Grilled Chicken Plate: A big spoon of hummus next to grilled chicken and rice turns a plain plate into a full meal. The cool dip and the hot chicken play well together.
Sandwich Spread: Use hummus in place of mayonnaise in chicken or tuna sandwiches. It adds flavor and body with less fat, and it keeps the bread from going soggy.
Nutrition Information
| Calories per Serving | 180 (approximate) |
| Protein | 5g |
| Carbs | 16g |
| Fat | 11g |
| Fiber | 4g |
| Sugar | 2g |
| Sodium | 240mg |
| Serving Size | About 1/4 cup |
| Servings per Recipe | 8 |
Chickpeas bring the fiber and most of the protein in this bowl, while the tahini and olive oil bring healthy fats that keep you full. Rinsing the canned chickpeas washes away a good part of their salt, which keeps the sodium in a fair range for a dip. Few snacks give this much fiber and protein for so few calories.
Disclaimer: Nutrition values are approximate and calculated per serving using standard ingredient amounts. Values may vary based on brands used and portion sizes.
Follow on Pinterest for new updates at Beyaskitchen
Frequently Asked Questions
1. Can I make this hummus recipe ahead of time?
Yes, and it tastes even better when you do. Make the hummus 1 day ahead and keep it sealed in the fridge. The lemon, garlic, and tahini settle into each other overnight, and the flavor turns rounder. Take it out 20 to 30 minutes before serving, stir well, and add the oil swirl and toppings at the last minute so they look fresh.
2. Why is my hummus thick and grainy instead of smooth?
Three things cause this most of the time. The tahini was not whipped first, the blending stopped too soon, or there was not enough liquid in the bowl. Fix it by blending for 1 to 2 minutes more and adding ice water one spoon at a time. Rubbing the skins off the chickpeas also helps a lot. Thick hummus almost always just needs more time and a little more cold water.
3. Can I make hummus without tahini?
Yes, you can. Leave the tahini out and add 2 extra tablespoons of olive oil plus 2 tablespoons of the saved chickpea liquid. The hummus will still blend smooth, but the taste will be lighter and less rich, since tahini brings the deep nutty flavor. This swap also matters for guests, because a tahini free bowl is the only version that is safe for someone with a sesame allergy.
4. How long does homemade hummus keep in the fridge?
Homemade hummus keeps well for up to 5 days in a sealed container in the fridge. A thin film of olive oil on top helps it stay fresh. Trust your nose before you serve it: fresh hummus smells like lemon and chickpeas, while old hummus smells sour and sharp. If it smells off or tastes fizzy, throw it out and make a fresh batch.
5. Do I really need to peel the chickpeas for smooth hummus?
No, you do not need to, but it does help. The thin skins are the main thing that makes home hummus feel a little rough. Rubbing the rinsed chickpeas in a clean towel slips many skins off in about a minute. If you skip the peeling, just blend longer and add a spoon more ice water. The result will still be smooth and creamy, only a touch less silky than the peeled version.
Conclusion
Great hummus does not need rare foods or hard skills. It needs good tahini, a full minute of whipping, and the patience to blend a little longer than feels normal. Once you taste this hummus recipe fresh from your own processor, the store tubs will taste flat and heavy. Make it once for a snack plate, and it will soon earn a steady spot in your weekly kitchen routine. If you loved this recipe, save it to your easy dips and snacks Pinterest board so you can find it easily later!
Get more updates at: beyaskitchen
Ingredients
Method
- Drain the chickpeas over a bowl and save 1/4 cup of the liquid. Set 2 tablespoons of whole chickpeas aside for the top. Rinse the rest and drain well. For the smoothest result, rub them in a clean towel to slip off loose skins.
- Blend the tahini, lemon juice, and 2 tablespoons of ice water in a food processor for 1 full minute, until pale and whipped.
- Add the garlic, cumin, and salt. Blend 30 seconds and scrape down the sides.
- Add half the chickpeas and blend 1 minute. Scrape the sides, add the rest, and blend 1 to 2 minutes more until smooth.
- With the machine running, pour in the olive oil slowly. Add ice water or saved chickpea liquid one tablespoon at a time until soft and fluffy.
- Taste and add more salt or lemon juice as needed, blending a few seconds after each change.
- Spoon into a shallow bowl, swirl the top with the back of a spoon, and finish with olive oil, the saved chickpeas, paprika, and parsley. Serve with warm pita.
Notes
• Contains sesame (tahini), a major allergen. Always tell guests before serving.
• Keeps up to 5 days in the fridge in a sealed container with a thin film of olive oil on top. Freezes well for up to 3 months.