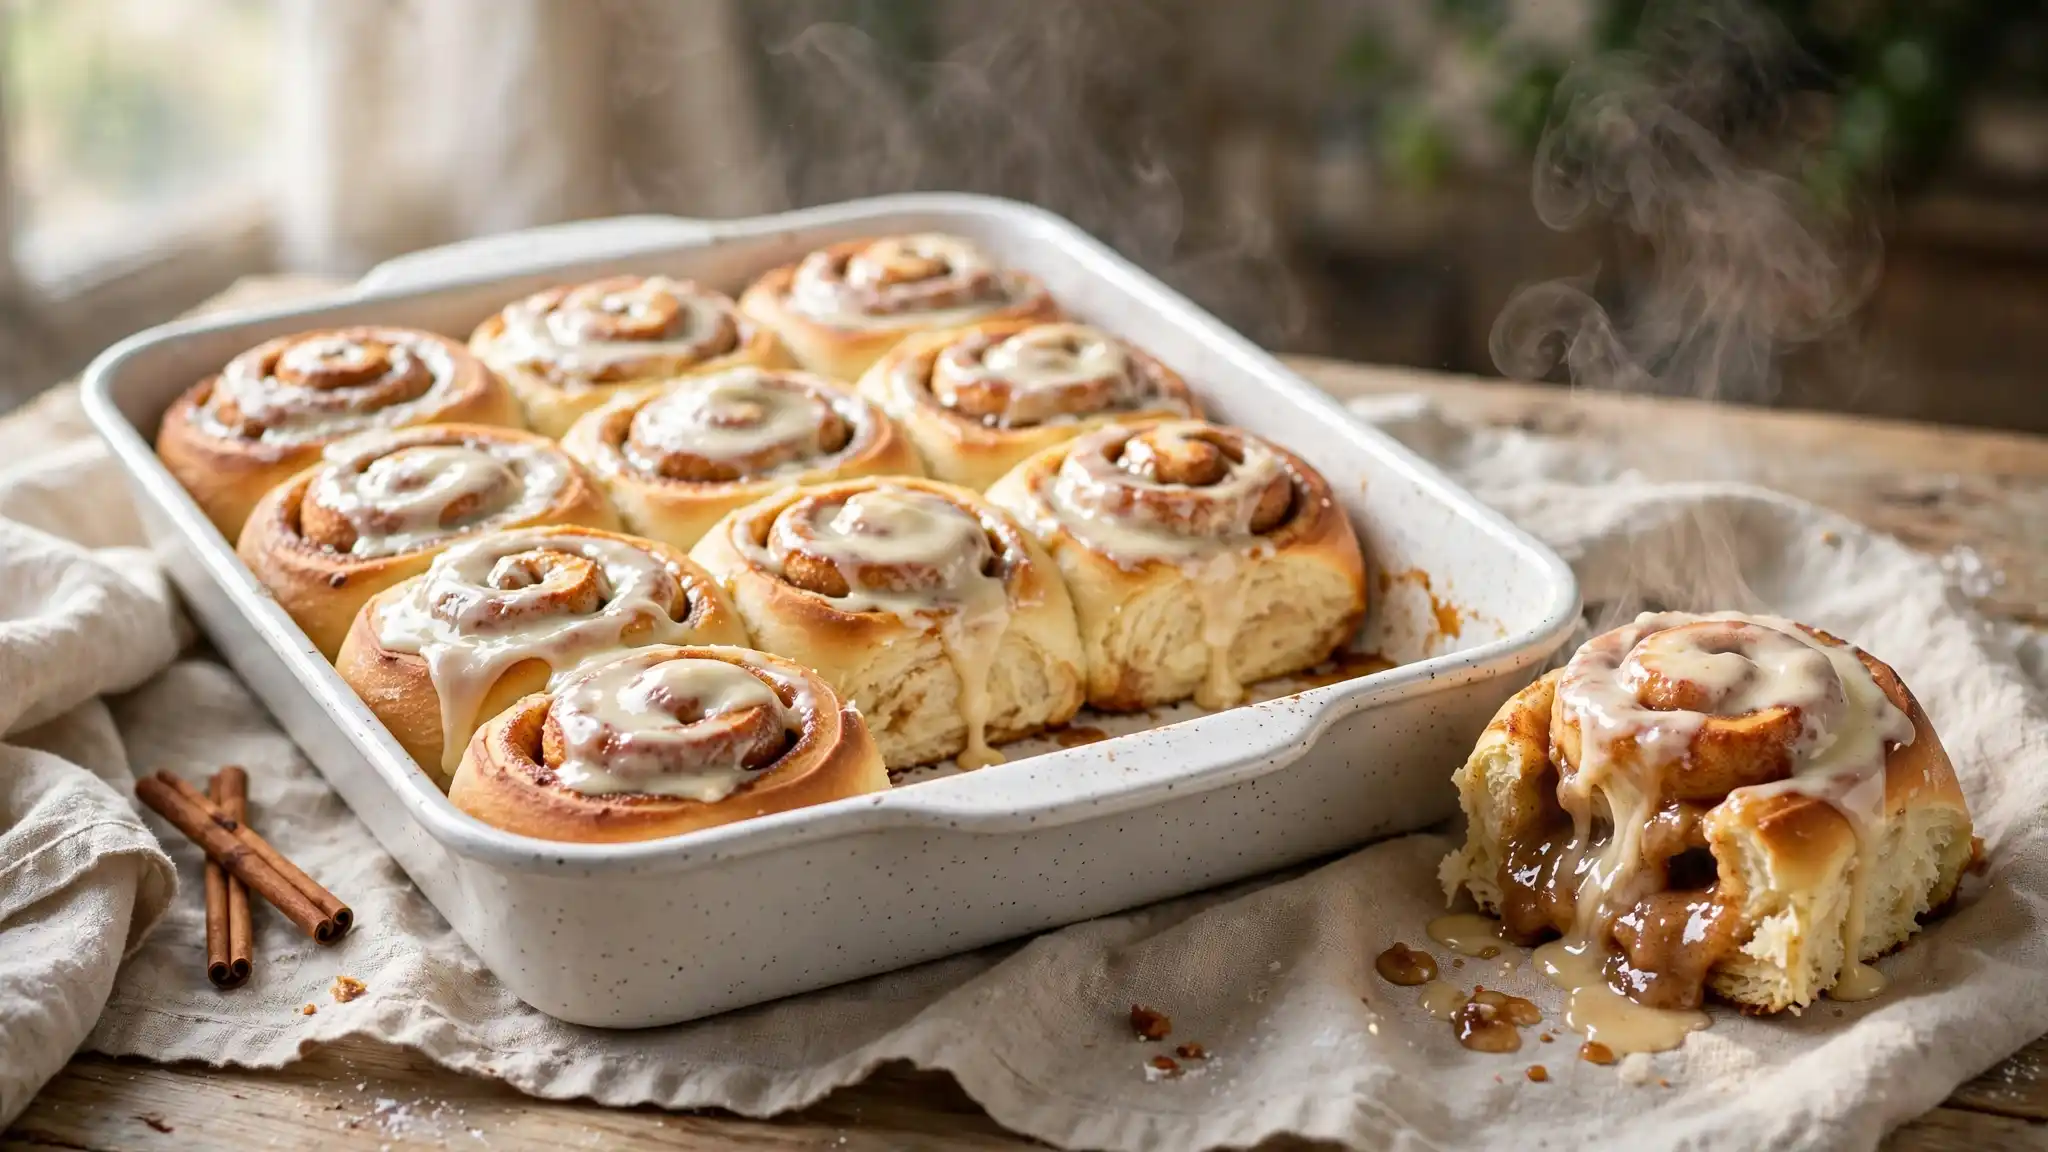
Homemade Cinnamon Rolls: Soft, Fluffy, and Ready From Scratch
Homemade cinnamon rolls have a smell that pulls people out of their bedrooms without anyone needing to call them. That combination of warm butter, brown sugar, and cinnamon working through a hot oven is something no store-bought tube can replicate.
What makes this cinnamon rolls recipe worth choosing is the dough. A small amount of sugar and butter enriches the flour, and whole milk keeps the crumb tender without making the rolls heavy. The result is a soft, pillowy roll that pulls apart in layers and stays that way for two days.
This recipe takes about 2 hours and 25 minutes from start to finish, most of which is hands-off rise time. The actual work is closer to 30 minutes.
Why You Will Love This Recipe
- Uses instant yeast so there is no separate proofing step, saving 10 minutes right at the start
- Each roll stays genuinely soft for up to 2 days at room temperature when stored covered
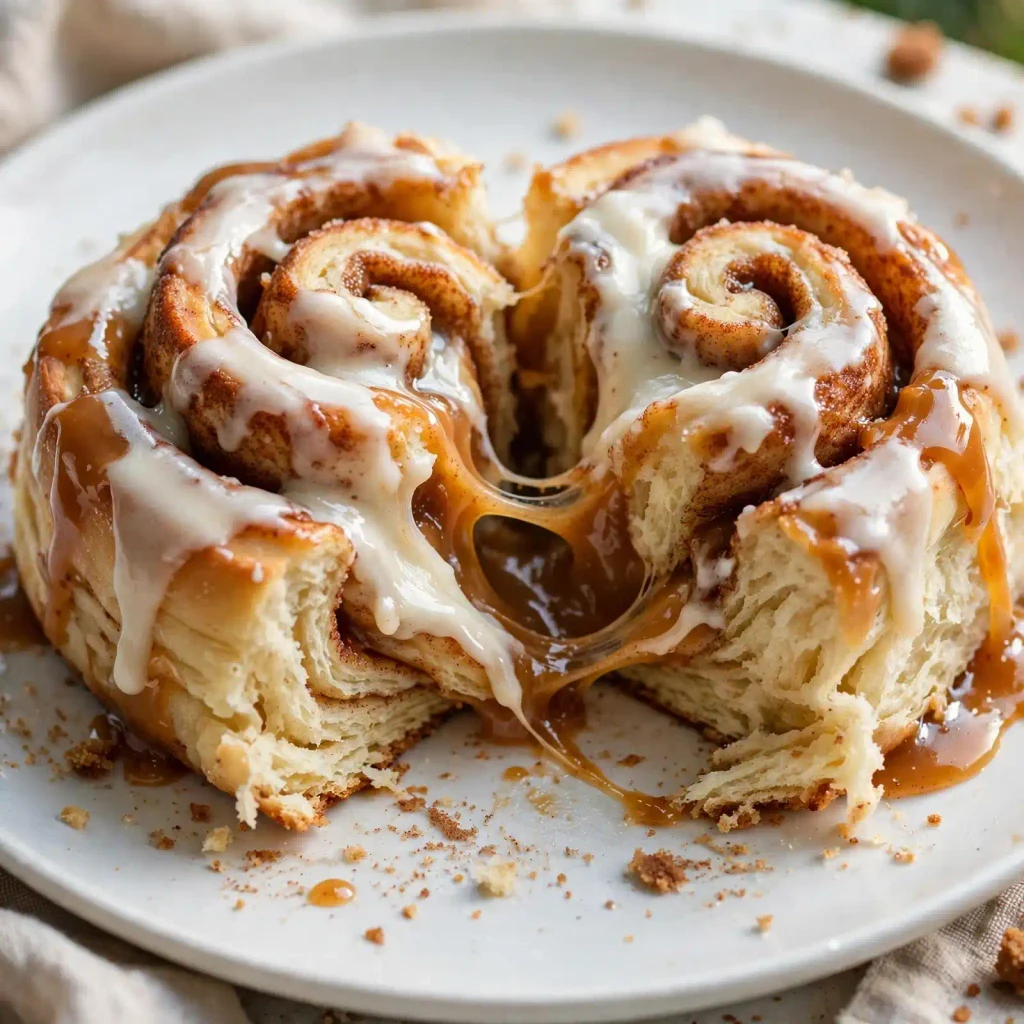
- The cream cheese glaze takes 5 minutes to make and melts into every layer while the rolls are still warm
- Makes 12 rolls in a standard 9×13 inch pan, right for weekend mornings or holiday breakfasts
- The filling stays inside the rolls during baking instead of pooling and burning on the pan bottom
- No specialty equipment beyond a stand mixer with a dough hook
Ingredients
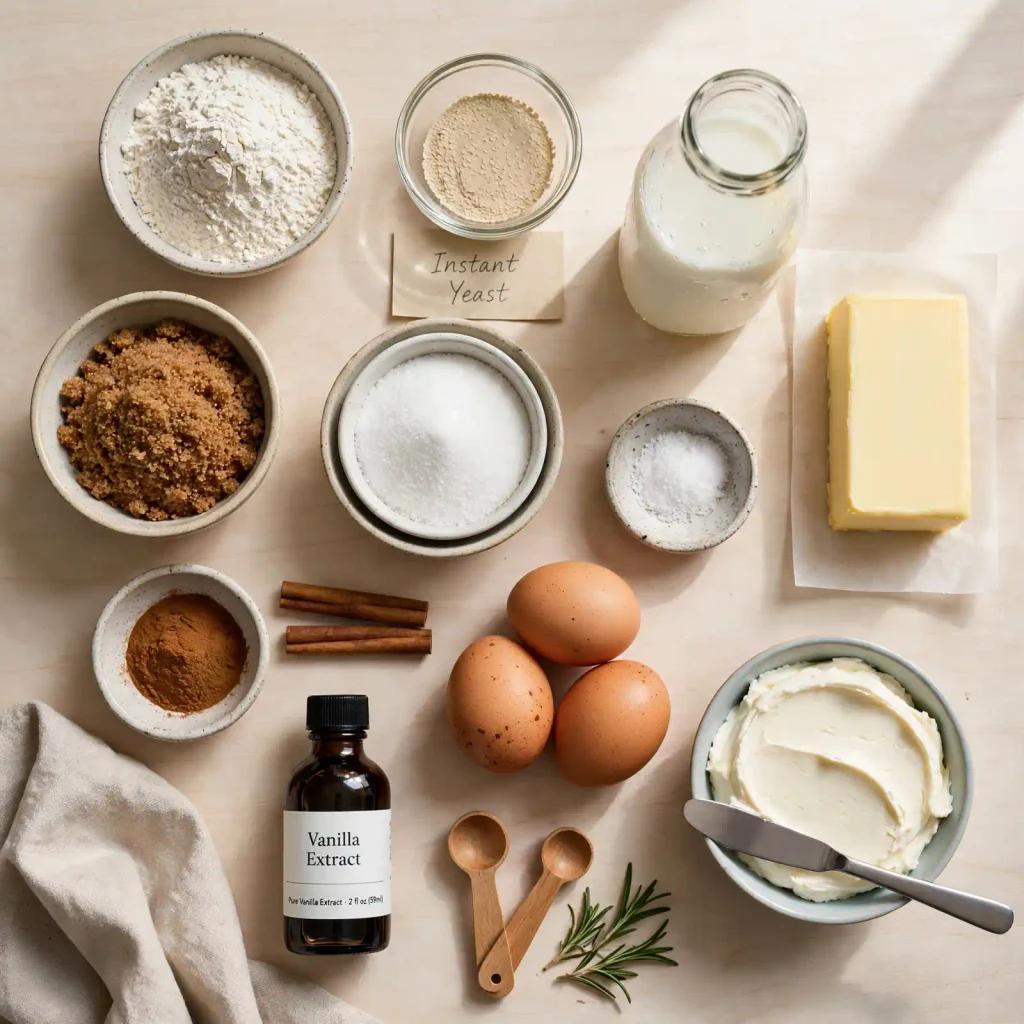
For the Dough:
- 4 cups (500g) all-purpose flour, plus extra for dusting (King Arthur Unbleached All-Purpose gives a consistently soft, structured result)
- 2¼ teaspoons (7g) instant yeast, one standard packet
- 1 cup (240ml) whole milk, warmed to 110°F (43°C)
- ⅓ cup (67g) granulated sugar
- ⅓ cup (75g) unsalted butter, melted and cooled slightly
- 2 large eggs, room temperature
- 1 teaspoon fine salt
For the Cinnamon Sugar Filling:
- ⅓ cup (75g) unsalted butter, softened to room temperature
- ¾ cup (150g) packed light brown sugar
- 2½ tablespoons ground cinnamon
- 1 pinch fine salt
For the Cream Cheese Glaze:
- 4 oz (113g) full-fat block cream cheese, softened
- 1 cup (120g) powdered sugar, sifted
- 3 to 4 tablespoons whole milk
- 1 teaspoon pure vanilla extract
Allergen and Dietary Disclosure
Contains: Gluten, dairy, eggs
Gluten-Free Option: Bob’s Red Mill 1-to-1 Gluten-Free Baking Flour can replace all-purpose flour in equal amounts. The dough will be stickier and the finished rolls denser. Bake with rolls touching in the pan so they support each other during the rise.
Dairy-Free Option: Replace whole milk with full-fat oat milk. Use Miyoko’s dairy-free butter in the dough, filling, and glaze. Swap the cream cheese for a dairy-free block alternative.
Egg-Free Option: Replace each egg with 1 flax egg. Stir 1 tablespoon ground flaxseed with 3 tablespoons water and rest 5 minutes before using. Expect a slightly denser crumb.
Nut-Free: No nuts in this recipe. Check cinnamon and powdered sugar labels for shared-facility cross-contamination warnings.
Disclaimer: Always confirm ingredients with your specific brand labels, as formulations vary by manufacturer.
Equipment Needed
- Stand mixer with dough hook. Not strictly required, but reduces kneading time significantly. By hand, knead for 8 to 10 minutes. The mixer reaches the same point in 6 minutes.
- 9×13 inch baking pan. The rolls fit perfectly with a small gap between each one, allowing them to expand and press together during the second rise.
- Rolling pin. Needed to roll the dough into a consistent rectangle before adding the filling.
- Bench scraper or sharp knife. A single clean downward cut gives the sharpest edges without compressing the layers.
- Instant-read thermometer. Checking milk temperature at 110°F is faster and more reliable than guessing by feel.
Step-by-Step Instructions
Step 1: Warm the Milk and Mix the Wet Ingredients
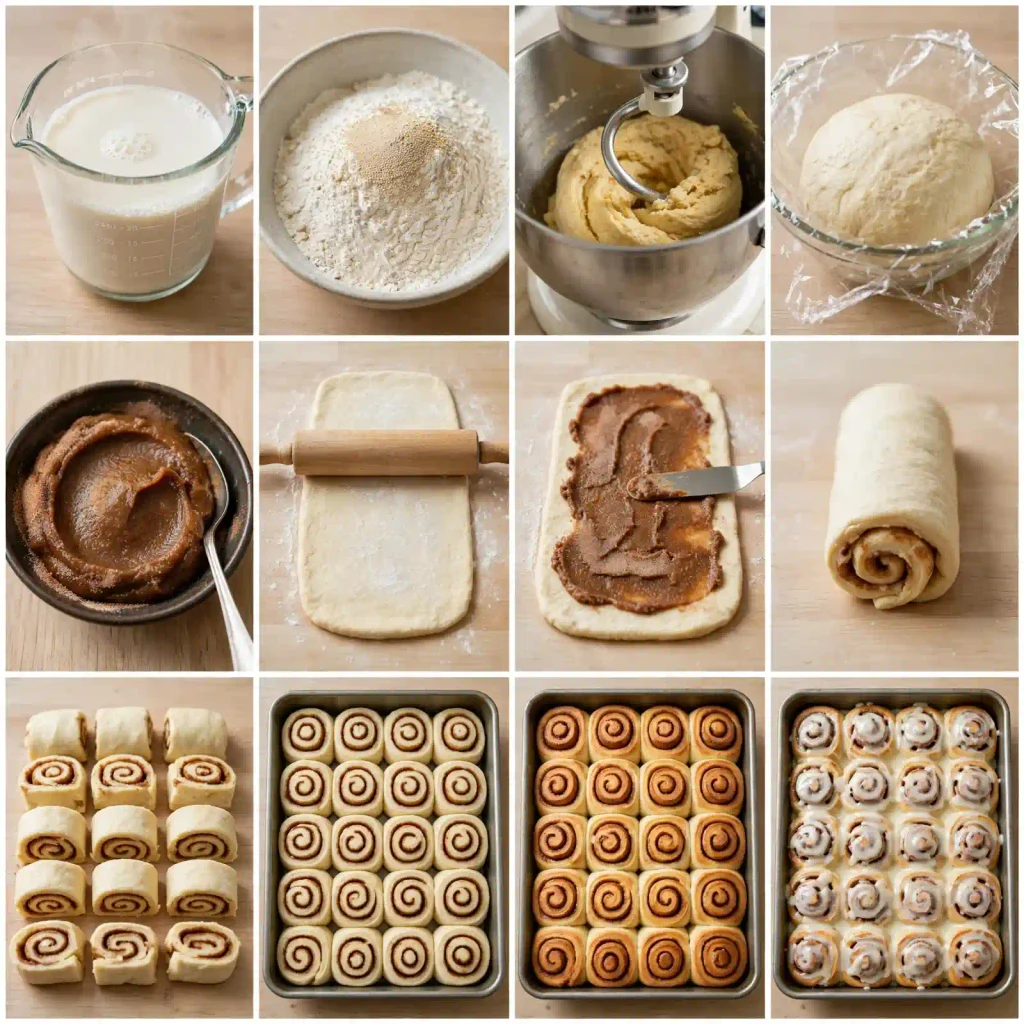
Warm the whole milk to 110°F (43°C) using an instant-read thermometer. Combine with the melted butter, sugar, eggs, and salt in the stand mixer bowl. Stir briefly until smooth and slightly yellow from the eggs.
Chef’s Note: Below 100°F the yeast activates slowly. Above 120°F the heat kills it completely and the dough will never rise.
Step 2: Add Flour and Yeast
Add the instant yeast and 3 cups of flour. Mix on low until a shaggy dough forms, about 1 minute. Add the remaining 1 cup of flour and mix on medium for 6 minutes until smooth and slightly tacky but pulling cleanly away from the bowl sides. Add flour 1 tablespoon at a time only if the dough sticks to the bowl bottom after 5 minutes.
Chef’s Note: Slightly tacky is exactly right. Completely dry dough means too much flour went in, and the rolls will come out dense.
Step 3: First Rise
Shape the dough into a ball and place it in a lightly greased bowl. Cover tightly with plastic wrap and set it somewhere warm for 60 minutes until roughly doubled in size.
Step 4: Make the Cinnamon Sugar Filling
Stir the softened butter, packed brown sugar, cinnamon, and pinch of salt together until the mixture forms a thick, spreadable paste. It should hold together without being runny. Room temperature butter is the starting point.
Chef’s Note: Mixing everything into a paste keeps the filling from leaking during baking. Loose filling is what causes sugar to pool at the bottom of the pan and burn.
Step 5: Roll and Fill the Dough
Turn the risen dough onto a lightly floured surface and roll it into an 18×12 inch rectangle. Spread the filling evenly across the entire surface using an offset spatula, leaving a ½-inch border along the far long edge only to help the roll seal when finished.
Step 6: Roll, Cut, and Arrange
Roll the dough tightly into a log starting from the near long edge, using both hands and working gradually. Pinch the seam firmly to seal. Cut into 12 equal pieces with one clean downward motion using a bench scraper. Place rolls cut-side up in a greased 9×13 inch pan with a small gap between each.
Step 7: Second Rise
Cover the pan loosely with plastic wrap and let the rolls rise for 30 minutes. They should puff up and press lightly against each other by the end. Don’t let them overproof to the point of collapsing against each other.
Step 8: Bake
Preheat the oven to 350°F (175°C) during the second rise. Bake on the center rack for 23 to 25 minutes until the center rolls register 190°F (88°C) on an instant-read thermometer. Don’t rely on color alone since the edges always brown before the centers are done.
Chef’s Note: The cinnamon sugar filling insulates the dough and keeps the interior looking lighter than expected. Pull at 190°F and the texture will be soft throughout.
Step 9: Make the Cream Cheese Glaze
Beat the softened cream cheese until completely smooth. Add sifted powdered sugar, vanilla, and 3 tablespoons of milk. Stir until pourable. Add the fourth tablespoon of milk only if the glaze looks too thick to drizzle.
Step 10: Glaze and Serve
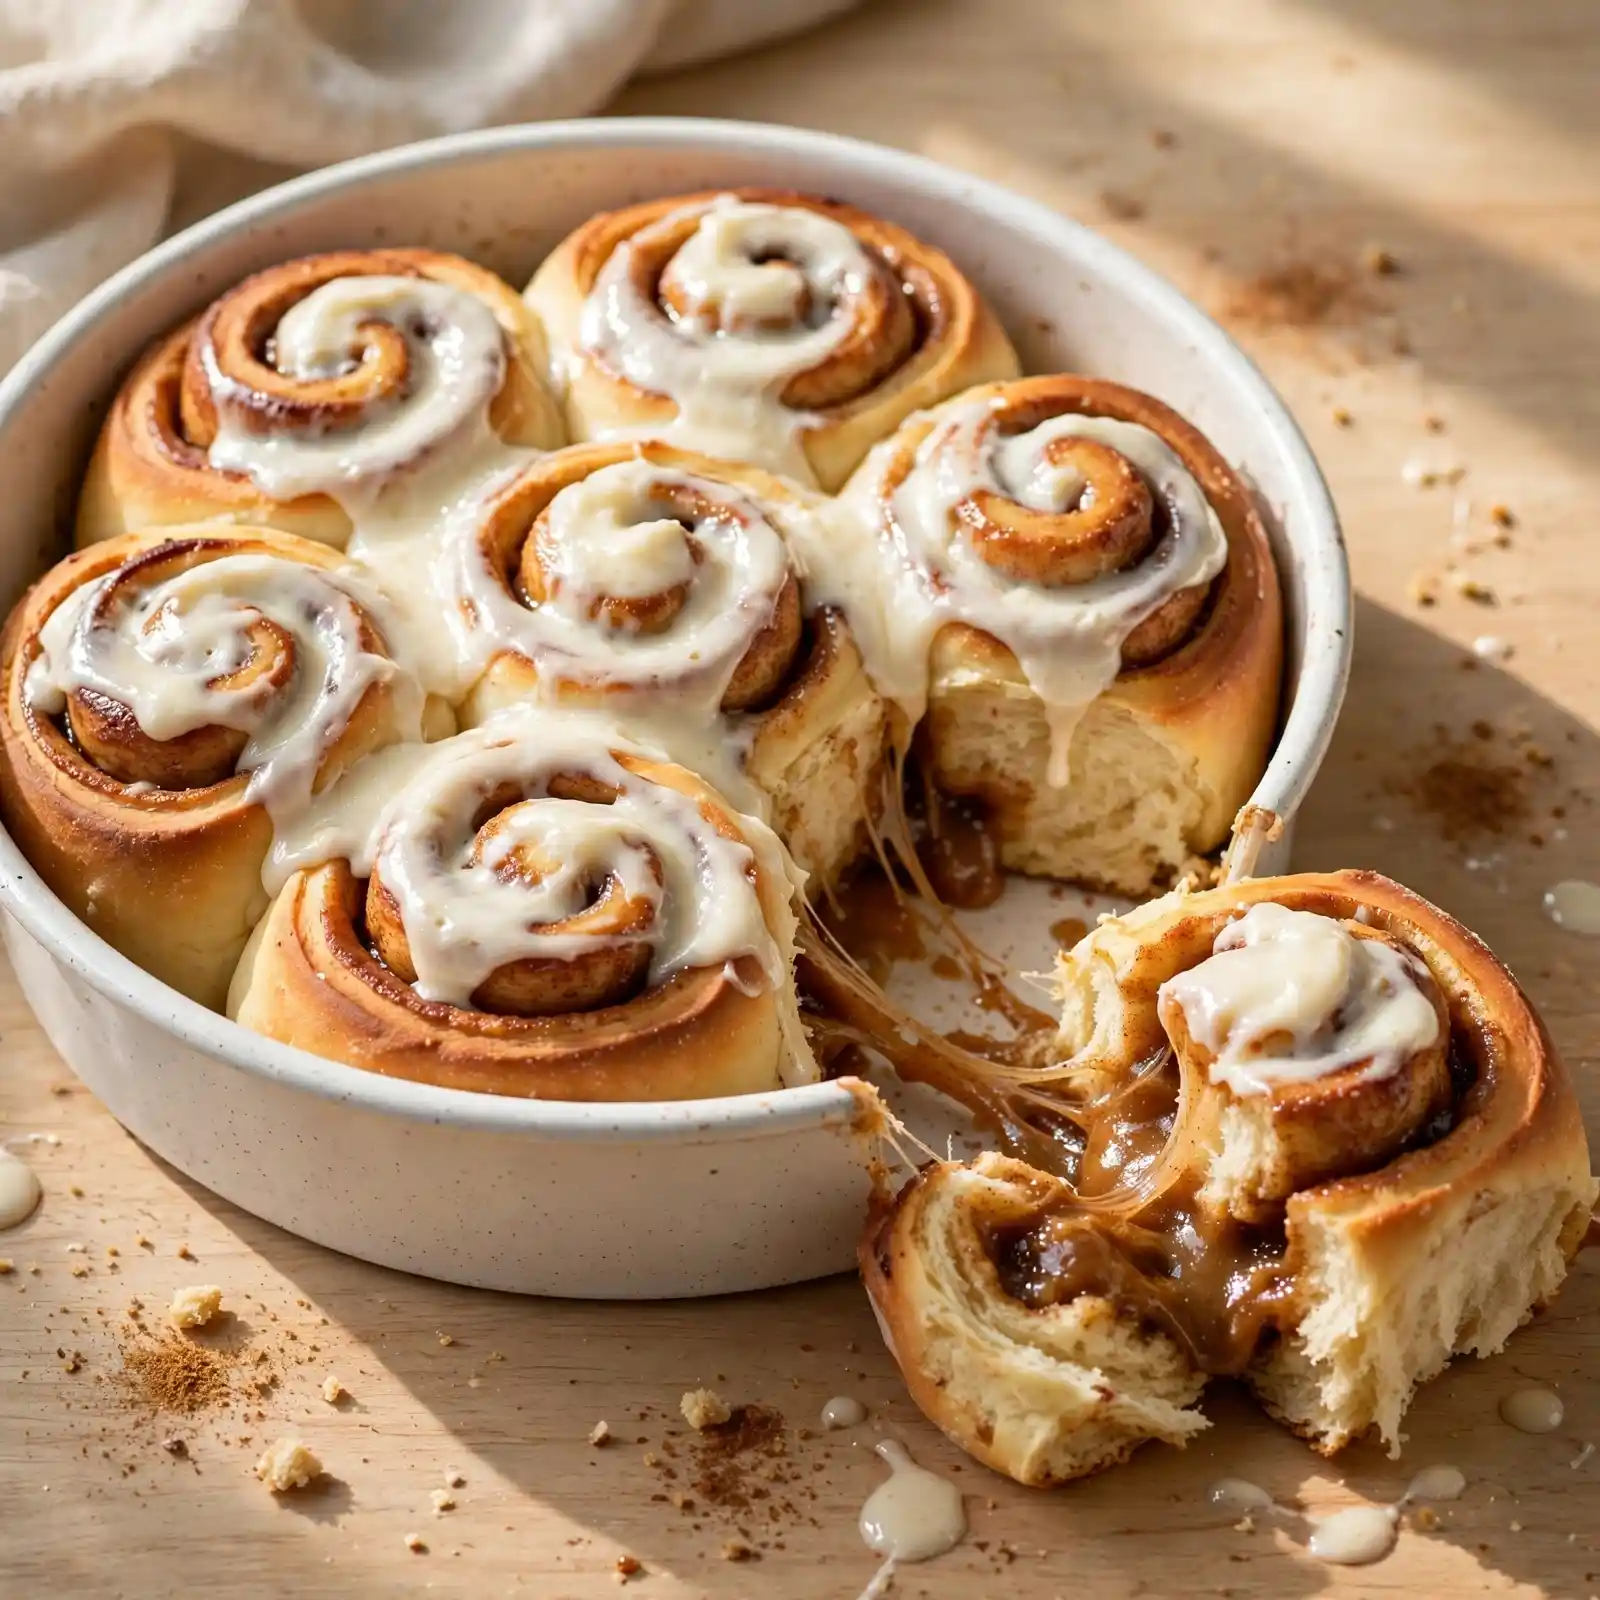
Pour the cream cheese glaze over the rolls about 5 minutes out of the oven. The residual heat melts the glaze just enough to pull it between the layers. Serve directly from the pan.
Why the Second Rise Makes or Breaks the Texture
The first rise builds flavor. The second rise, after shaping and cutting, creates the open, pull-apart texture in the finished roll. Give the cut rolls the full 30 minutes in the pan before baking. The difference in the final texture is not subtle and cannot be recovered once skipped.
Expert Tips and Tricks
- Measure flour by weight. Scooping from the bag packs it into the cup and can add up to 25% more than intended, which makes the rolls dense after baking.
- Softened butter for the filling is non-negotiable. Cold butter does not blend into a paste and separates from the dough during baking, sending the filling to the bottom of the pan.
- Roll the dough to a consistent thickness across the whole rectangle. Thin spots tear during cutting and thick spots bake unevenly.
- Make-Ahead: After placing the cut rolls in the pan, cover tightly and refrigerate overnight instead of doing the second rise at room temperature. The next morning, rest the pan for 30 minutes, let the rolls finish rising, then bake as directed.
- Storage: Covered at room temperature the rolls stay soft for up to 2 days. After that, refrigerate and reheat individual rolls for 20 seconds in the microwave.
- Use unflavored dental floss to cut the log if you don’t have a bench scraper. Slide it under, cross the ends over the top, and pull outward for a cleaner cut than a knife produces.
Allergen-Specific Cooking Notes
For the gluten-free version with Bob’s Red Mill 1-to-1 flour, roll the dough slightly thicker, about 10×14 inches instead of 12×18, so it holds together during slicing. For the dairy-free version, Miyoko’s butter melts faster than regular butter, so check the rolls at the 20-minute mark to prevent over-browning on the pan bottom.
Storage Instructions
Room Temperature: Covered for up to 2 days. The cream cheese glaze is stable at room temperature during this window.
Refrigerator: Covered for up to 5 days. Reheat individual rolls 20 to 25 seconds in the microwave to restore the soft texture.
Freezer: Freeze baked, cooled rolls without the glaze. Wrap each individually in plastic wrap, then place in a freezer bag. Freeze up to 2 months. Thaw at room temperature for 2 hours, then reheat and glaze before serving.
Reheating: Microwave individual rolls 20 to 25 seconds. For a full pan, cover with foil and warm at 300°F (150°C) for 10 to 12 minutes.
Make-Ahead Notes: Shape and cut the rolls, arrange in the pan, cover tightly, and refrigerate before the second rise. Next morning, rest at room temperature 30 minutes, finish the rise, then bake. The flavor deepens slightly with an overnight cold rise.
Variations and Substitutions
Spiced Version: Add ¼ teaspoon each of ground cardamom and ground nutmeg to the cinnamon sugar filling. The cardamom adds a floral note that makes each bite taste more layered without being unfamiliar.
Mild Version for Kids: Reduce the cinnamon to 1½ tablespoons and replace ¼ cup of brown sugar with plain granulated sugar. The filling turns sweeter and gentler, which most young children accept without any negotiation.
Vegetarian: Already vegetarian. No adjustments needed.
Gluten-Free: Use Bob’s Red Mill 1-to-1 Gluten-Free Baking Flour in an equal amount. The dough will be stickier and less elastic. Expect a slightly denser, less layered roll with a more compact crumb.
Alt: Overhead view of 12 unbaked cinnamon rolls arranged in a greased 9×13 inch pan, showing the cinnamon sugar swirl in each roll before the second rise, easy homemade cinnamon rolls recipe ready to proof
What to Serve With This
Fresh Fruit Salad: Sliced strawberries, orange segments, and blueberries cut through the richness of the glaze without competing with the cinnamon filling.
Hot Coffee or Chai: A strong, slightly bitter cup balances the sweetness and makes the cinnamon in the filling taste more pronounced. This combination works for breakfast or a weekend afternoon equally well.
Scrambled Eggs: Soft scrambled eggs turn a sweet-only breakfast into something more balanced and filling without requiring much extra effort.
Nutrition Information
| Nutrient | Per Serving (1 roll) |
| Calories | approximately 420 |
| Protein | 8g |
| Carbohydrates | 65g |
| Fat | 15g |
| Fiber | 2g |
| Sugar | 28g |
| Sodium | 280mg |
Serving Size: 1 roll
Servings per Recipe: 12
Most of the sugar per roll comes from the filling and glaze combined. The dough itself is only lightly sweetened. To reduce overall sugar, cut the brown sugar in the filling to ½ cup (100g). The filling tastes less sweet but the cinnamon flavor stays strong. Protein comes primarily from the eggs and whole milk in the dough.
Disclaimer: Nutrition values are approximate and calculated per serving using standard ingredient amounts. Values may vary based on brands used and portion sizes.
Frequently Asked Questions
Can I make cinnamon rolls the night before and bake them in the morning?
Yes. After cutting and arranging the rolls in the pan, cover tightly and refrigerate before the second rise. The next morning, pull the pan out 30 minutes before baking and let the rolls finish rising at room temperature. Then bake at 350°F (175°C) for 23 to 25 minutes as normal. The flavor is slightly deeper with this method.
Why are my cinnamon rolls dense and doughy in the middle every time?
The rolls are either underbaked or the second rise was cut short. Always confirm doneness with a thermometer. The center should read 190°F (88°C). Rolls that don’t get the full 30-minute second rise bake up compact rather than fluffy.
Can I use active dry yeast instead of instant yeast?
Yes. Combine the warm milk, a pinch of sugar, and the active dry yeast in the bowl and wait 5 to 10 minutes until foamy before adding anything else. If the mixture stays flat after 10 minutes, the yeast is expired and the dough will not rise. Start with a fresh packet.
How do I know when cinnamon rolls are fully baked?
Insert a thermometer into a center roll at 23 minutes. The target is 190°F (88°C). Color is not reliable because the edges always brown before the center rolls are done. The thermometer reading is the only accurate way to confirm the rolls are fully baked throughout.
My cinnamon rolls unroll completely when I bake them. What went wrong?
The log was rolled too loosely, or the butter in the filling was too warm. Each turn of the dough needs to be snug as you roll, and the filling butter should be softened but firm, not greasy or melted. Pinching the seam firmly at the end also helps the log hold its shape through cutting and baking.
Glaze the Rolls Warm, Not Hot
About 5 minutes out of the oven is the right moment. The rolls are warm enough to melt the glaze so it runs between the layers, but not so hot that it turns liquid and pools at the bottom. Glazing cold rolls gives a thick surface-only coating that sits on top rather than soaking in.
Follow on Pinterest for new updates at Beyaskitchen
Conclusion
The smell of cinnamon rolls baking changes the entire tone of a Saturday morning. Getting the dough right, respecting both rise times, and pulling the rolls at 190°F instead of guessing by color are the three things that separate a genuinely great batch from a disappointing one.
Once you have made these once the process becomes natural. You know what the dough should feel like, what the filling paste should look like, and you stop second-guessing the oven and reach for the thermometer instead.
If you loved this recipe, save it to your Homemade Breakfast Recipes Pinterest board so you can find it easily later.
Get updates of new recipes visit: Beyas kitchen
Homemade Cinnamon Rolls From Scratch
Ingredients
Method
- Warm milk to 110°F (43°C). Combine with melted butter, sugar, eggs, and salt in the mixer bowl.
- Add instant yeast and 3 cups flour. Mix on low until shaggy. Add remaining flour and mix on medium for 6 minutes until smooth and slightly tacky.
- Place in a greased bowl, cover, and rise in a warm spot for 60 minutes until doubled.
- Mix softened butter, brown sugar, cinnamon, and salt into a thick paste for the filling.
- Roll dough into an 18×12 inch rectangle. Spread filling to the edges, leaving a ½-inch border along the far long edge.
- Roll tightly into a log, pinch the seam, and cut into 12 pieces with a bench scraper.
- Place cut-side up in a greased 9×13 inch pan. Cover loosely and rise 30 minutes.
- Bake at 350°F (175°C) for 23 to 25 minutes until center rolls read 190°F (88°C).
- Beat cream cheese smooth. Add powdered sugar, vanilla, and 3 tablespoons milk. Stir until pourable.
- Pour glaze over rolls 5 minutes out of the oven. Serve warm from the pan.
Notes
- Measure flour by weight for consistent results
- Pull rolls at 190°F (88°C) internal temperature, not by color
- For overnight rolls, refrigerate after step 6 and let rise 30 minutes at room temperature before baking